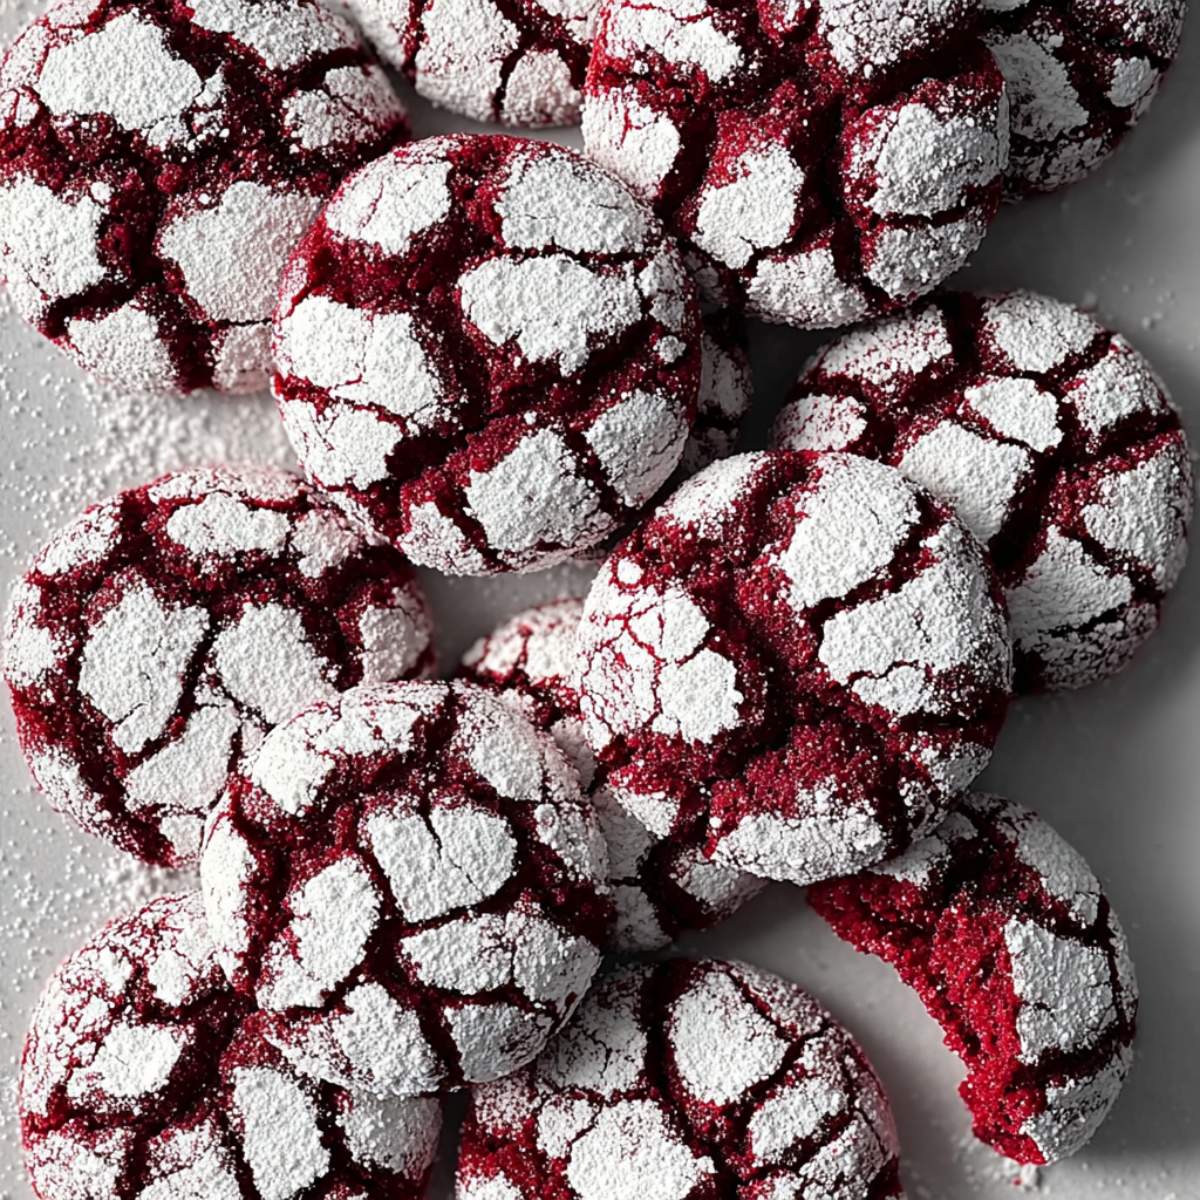
Red velvet crinkle cookies are the kind of thing that make people stop and stare before they even take a bite. That deep, dramatic crimson color peeking through a thick coating of white powdered sugar is just so striking. And then you bite in and the whole thing is soft and fudgy in the center with just the tiniest cocoa flavor running through it, and you think, okay, these are actually as good as they look. That doesn't always happen with pretty cookies, but it definitely happens here.
What makes these so fun to bake is the timing. I pull these out every December for our Christmas cookie tray, and they honestly look like they came from a fancy bakery. But I also make them in February around Valentine's Day because that bold red color is absolutely perfect for it. Whether you're building a holiday dessert spread or just want something dramatic and delicious on a weekend, this red velvet crinkle cookies recipe delivers every single time.
Why You'll Love This Red Velvet Crinkle Cookies Recipe
- Show-stopping looks with minimal effort. The crackled powdered sugar top happens naturally as the cookies bake and puff up. You don't have to do anything fancy to get that bakery-style result.
- Fudgy and soft in the center. These are not cakey, dry, or crumbly. When made right, red velvet crinkle cookies have a brownie-like texture in the middle that is completely irresistible.
- Perfect for the holidays AND Valentine's Day. The red color makes these the most versatile cookie on your baking list. They work for Christmas, Valentine's Day, and honestly any time you want to impress someone.
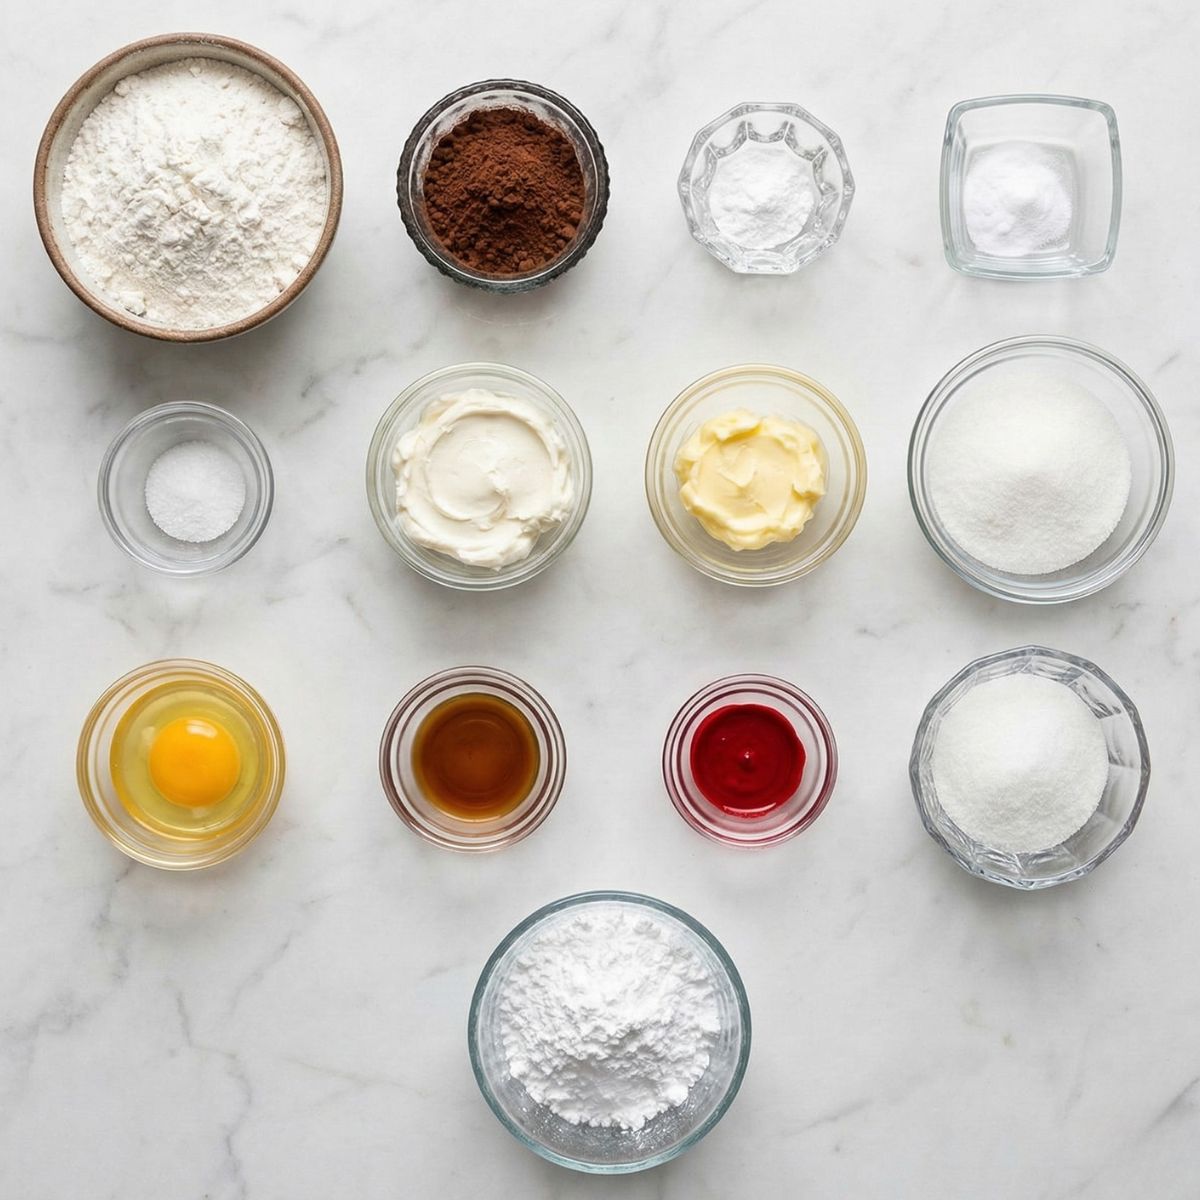
Ingredients for Red Velvet Crinkle Cookies
You don't need anything unusual for this recipe. Most of what you need is probably already in your pantry, and the few things you need to grab at the store are totally easy to find. Here's everything that goes into my favorite batch of red velvet crinkle cookies.
What You'll Need
- 1 and ½ cups all-purpose flour
- 2 tablespoons unsweetened cocoa powder
- 1 teaspoon baking powder
- ¼ teaspoon baking soda
- ¼ teaspoon salt
- 4 oz (half a block) full-fat cream cheese, softened to room temperature
- ¼ cup (4 tablespoons) unsalted butter, softened to room temperature
- ¾ cup granulated sugar
- 1 large egg, room temperature
- 1 teaspoon vanilla extract
- 1 tablespoon red gel food coloring
- ½ cup granulated sugar (for the first rolling)
- ¾ cup powdered sugar (for the second rolling)
Why These Ingredients Matter
- Full-fat cream cheese is the secret to the fudgy, melt-in-your-mouth center that sets these cookies apart from a basic red velvet cookie. It adds a subtle tang, keeps the dough moist, and gives the cookies that soft, dense texture that people can't stop eating. Don't swap it for low-fat, it won't behave the same way in the dough.
- Red gel food coloring instead of liquid food coloring is a big deal here. Gel coloring is concentrated, so you get that vivid, deep red color without adding too much extra liquid to the dough. Liquid food coloring can make the dough too wet and affect how the cookies spread and bake. One tablespoon of gel gives you exactly the bold color you see in the photo.
- The double sugar coating, first granulated then powdered, is what creates those beautiful, defined crinkle cracks. The granulated sugar layer helps the powdered sugar stay white and thick on the outside instead of absorbing into the dough. If you skip the granulated layer and go straight to powdered sugar, the coating soaks in during baking and you lose the crinkle effect. Don't skip it.
How to Make Red Velvet Crinkle Cookies
This dough needs to chill before baking, so plan a little ahead. I usually make the dough in the afternoon and bake in the evening, or make it the night before and bake the next morning. It's worth every minute of waiting.
Step-by-Step Directions
- Whisk your dry ingredients together. In a medium bowl, whisk together 1 and ½ cups all-purpose flour, 2 tablespoons cocoa powder, 1 teaspoon baking powder, ¼ teaspoon baking soda, and ¼ teaspoon salt until fully combined. Set the bowl aside.
- Beat the cream cheese and butter until fluffy. In a large bowl, beat 4 oz softened cream cheese and ¼ cup softened butter together on medium speed for about 2 minutes until the mixture looks smooth, pale, and creamy with no lumps remaining.
- Add the sugar and beat again. Add ¾ cup granulated sugar to the cream cheese mixture and beat for another 2 minutes until light and fluffy. This step creates the right base texture for your cookies, so don't rush it.
- Mix in the egg, vanilla, and red food coloring. Add 1 large room-temperature egg, 1 teaspoon vanilla extract, and 1 tablespoon red gel food coloring. Beat on medium until everything is fully combined and the dough is a rich, even red color throughout.
- Add the dry ingredients. Pour the flour mixture into the wet ingredients and mix on low speed just until a soft, slightly sticky dough forms. Stop as soon as you don't see dry streaks. Overmixing will toughen the cookies.
- Chill the dough for at least 2 hours. Cover the bowl tightly with plastic wrap and refrigerate for a minimum of 2 hours, or overnight. The dough will firm up and become much easier to roll. Don't skip this step, chilling is what prevents the cookies from spreading too flat during baking.
- Preheat your oven to 350°F (175°C). Line two baking sheets with parchment paper. Set out two bowls, one with ½ cup granulated sugar and one with ¾ cup powdered sugar.
- Roll the dough balls and double-coat them. Scoop out about 1 and ½ tablespoons of chilled dough and roll it into a smooth ball. Roll it first in the granulated sugar until fully coated, then immediately roll it generously in the powdered sugar until thickly covered. Place 2 inches apart on the prepared baking sheets.
- Bake for 11 to 13 minutes, until the edges look set and the tops are puffed and cracked with those beautiful white crinkle lines. The centers will still look slightly soft, and that's exactly right.
- Cool on the pan for 5 minutes before transferring to a wire rack. The cookies continue to set as they cool, and moving them too soon can cause them to fall apart.
Hint: Do not roll your dough balls too small. If they're smaller than a golf ball, they'll bake through too quickly and lose that fudgy center you're going for. Aim for about 1 and ½ tablespoons of dough per cookie for the best results.
If you love soft, bakery-style cookies, my Peanut Butter Blossoms use a similar soft-dough technique and are just as crowd-pleasing on a holiday cookie tray.
My Top Tips for Red Velvet Crinkle Cookies
The single most important thing I can tell you about this recipe is to not skip the dough chill time and not overbake. Those two things make or break red velvet crinkle cookies. The dough needs the cold to hold its shape in the oven, and the cookies need to come out while the center still looks soft. They will firm up on the pan. If they look fully done inside the oven, they will be overdone by the time they cool.
Gold Tip: Be generous with your powdered sugar coating. Really pile it on. You want each ball looking almost completely white before it goes into the oven. If you're too light-handed, the powdered sugar absorbs into the dough during baking and you lose the dramatic crinkle contrast that makes these cookies look so gorgeous.
Little Moments in the Kitchen
The first time I made red velvet crinkle cookies with Olivia, she walked into the kitchen, looked at the deep red dough sitting in the bowl, and said very seriously, "Mom. Is that blood?" I nearly choked. I explained it was red food coloring, showed her the little bottle, and she spent the next five minutes squinting at it like she wasn't entirely convinced. By the time the cookies came out of the oven all crackled and pretty, she had completely forgotten her suspicion and was already reaching for one.
The rolling station was her domain, though. She handled the double sugar coating with so much focus and care, like she was in charge of something very important, because in her mind she absolutely was. She pressed each ball so firmly into the powdered sugar that a few of them came out lopsided, but I didn't say a word because she was so proud. Olivia held up one particularly wonky cookie, looked at me, and said, "That one has character, Mom." She ate it first.
Substitutions for Red Velvet Crinkle Cookies
Gluten-Free: Swap the all-purpose flour 1:1 with a gluten-free flour blend. Bob's Red Mill 1-to-1 works very well here and the texture stays close to the original.
Dairy-Free: Use vegan cream cheese and vegan butter in equal amounts. Violife and Miyoko's both work well. The cookies will be slightly less rich but still fudgy and delicious.
Lower Sugar: Roll the dough balls in powdered sugar only, skipping the granulated sugar layer. The crinkle effect won't be as defined, but the cookies will still taste great and have a bit less sweetness overall.
Cake Mix Shortcut: If you want an even faster version, you can make red velvet crinkle cookies with cake mix by combining one box of red velvet cake mix, 2 eggs, and ⅓ cup vegetable oil. Mix, chill, roll in powdered sugar, and bake at 350°F for 10 to 12 minutes. It's not my preferred method, but it works in a pinch.
Variations on Red Velvet Crinkle Cookies
White Chocolate Chip Version: Fold ½ cup white chocolate chips into the chilled dough before rolling. The sweetness of the white chocolate against the subtle cocoa flavor in the red velvet dough is such a good combination. This is the version I make when I really want to go all out for a holiday party.
Cream Cheese Stuffed Version: Flatten each dough ball slightly, place a small cube of cold cream cheese in the center, and fold the dough back around it before rolling in the sugars. You get a creamy, tangy surprise in the center of every cookie that people absolutely lose their minds over.
Valentine's Day Version: Add a few drops of strawberry extract along with the vanilla for a subtle fruity note, and press a small conversation heart candy into the center of each warm cookie right after baking. They look adorable and taste like something from a specialty bakery. This pairs beautifully with something like my Matilda Chocolate Cake for a full Valentine's dessert spread.
Equipment for Red Velvet Crinkle Cookies
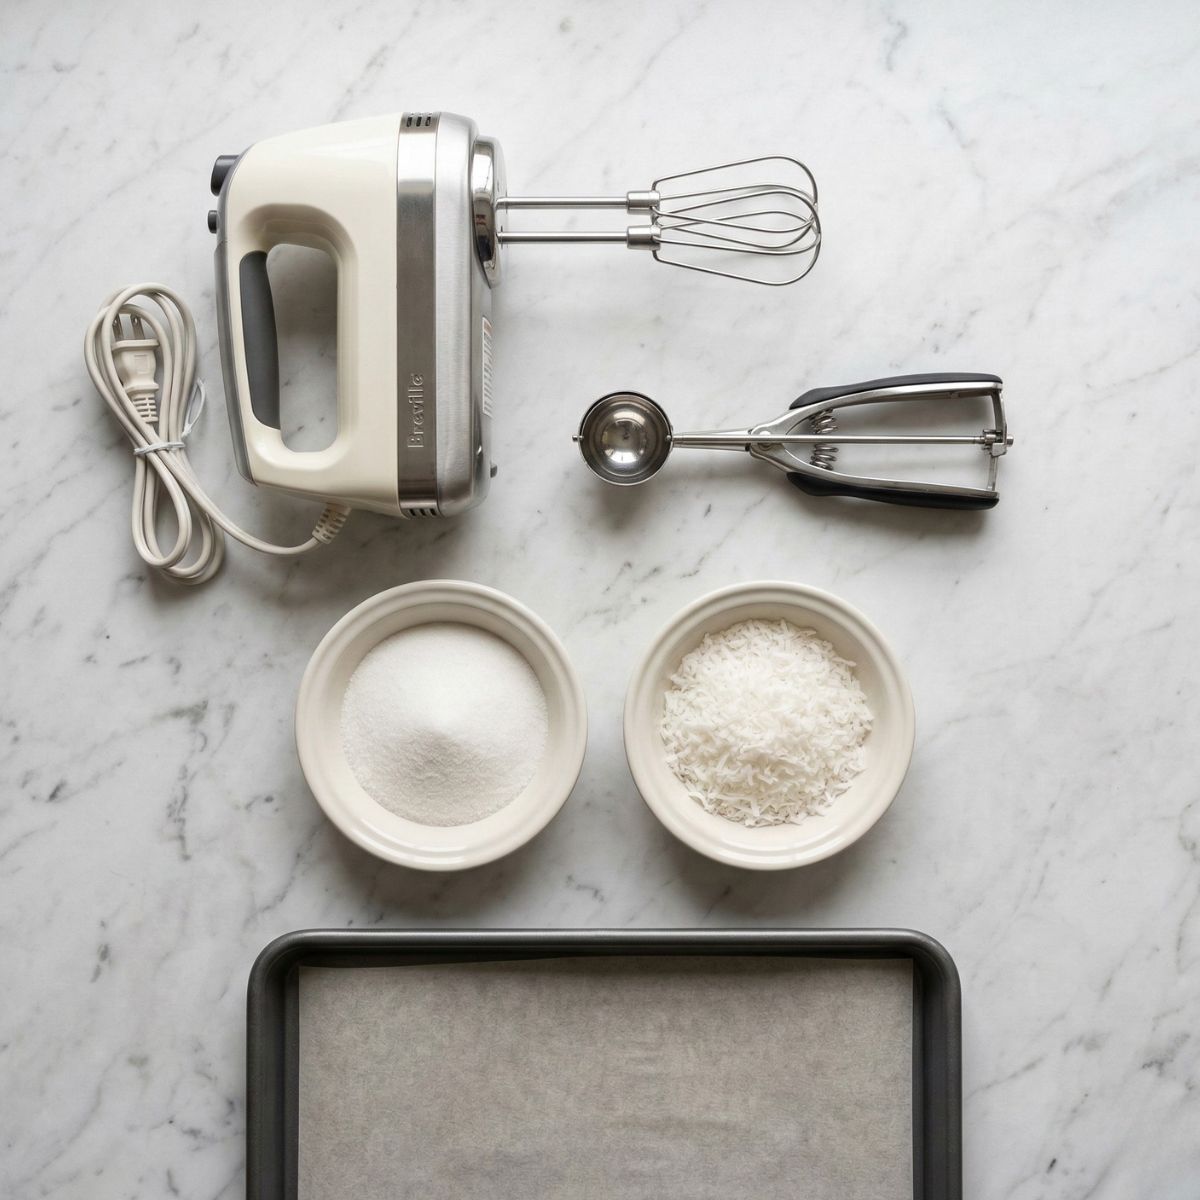
Electric hand mixer or stand mixer: Essential for properly creaming the butter and cream cheese together. You need those two to be completely smooth and fluffy before anything else goes in, and that's nearly impossible to achieve by hand.
Cookie scoop (1.5-tablespoon size): Keeping your dough balls the same size means every cookie bakes evenly and finishes at the same time. Uneven cookies mean some are overbaked while others are still raw in the center.
Two shallow bowls for rolling: One for granulated sugar and one for powdered sugar. Having them right next to each other makes the double-coating process fast and easy, especially when you're working with cold dough that you want to get back into the oven quickly.
Parchment-lined baking sheets: Parchment prevents sticking and promotes even browning on the bottom of the cookies. Avoid dark-colored pans for this recipe as they can cause the bottoms to overbrown before the tops are done.
If you love showing off your bakes, these red velvet crinkle cookies look amazing displayed on a cake stand next to my Oreo Cake for a dessert table that genuinely makes people gasp.
Storage Tips for Red Velvet Crinkle Cookies
- Room temperature: Store fully cooled cookies in an airtight container at room temperature for up to 4 days. They actually get softer and fudgier on day two, which I personally think is the best time to eat them.
- Fridge: These keep well in the fridge for up to 7 days in an airtight container. Bring them to room temperature for about 15 minutes before serving for the best texture.
- Freezer (baked cookies): Freeze baked, fully cooled red velvet crinkle cookies in a single layer on a baking sheet until solid, then transfer to an airtight freezer bag. They keep well for up to 2 months. Thaw at room temperature for 30 to 45 minutes before serving. Note: the powdered sugar coating may look slightly less bright after freezing, but a light dusting of fresh powdered sugar fixes this instantly.
- Freezer (dough): Roll the dough into balls, freeze them on a parchment-lined tray until solid, then store in a freezer bag for up to 2 months. When ready to bake, thaw in the fridge overnight, do the double sugar roll, and bake as directed, adding 1 to 2 extra minutes.
Olivia's Tip for Red Velvet Crinkle Cookies
Olivia says to use both hands when you roll the dough balls in the powdered sugar bowl, not just one. "If you use one hand it gets too sticky and the sugar goes all lumpy on one side." She tested this method thoroughly. Multiple times. With multiple cookies. She was right.
FAQ About Red Velvet Crinkle Cookies
What is the secret to crinkle cookies?
Two things: chilling the dough and the double sugar coating. Cold dough spreads slowly in the oven, which forces the cookie to puff up and crack rather than spreading flat. The granulated sugar layer under the powdered sugar keeps the white coating from being absorbed into the dough during baking, which is what gives you those clean, defined white cracks. Skip either step and you won't get the crinkle effect you're looking for.
What are common red velvet cookie mistakes?
The three biggest ones I see are using liquid food coloring instead of gel (makes the dough too wet), not chilling the dough long enough (cookies spread too flat and the crinkle cracks disappear), and overbaking (you lose the fudgy center that makes these worth making). Pull them out when the edges look set and the center still looks a little soft.
How do you make red velvet crinkles with cake mix?
Combine one box of red velvet cake mix with 2 large eggs and ⅓ cup vegetable oil. Stir until a thick dough forms, cover, and chill for at least 1 hour. Roll into balls, coat in powdered sugar, and bake at 350°F for 10 to 12 minutes. It's a great shortcut when you're short on time, though the from-scratch version with cream cheese has a richer, more fudgy texture that I think is worth the extra effort.
What is the secret ingredient in red velvet cake?
The classic secret ingredient is a small amount of unsweetened cocoa powder. It's not enough to make red velvet taste like a chocolate cookie or cake, but it adds a subtle depth and richness that you'd notice immediately if it were missing. The combination of cocoa, vanilla, and a slight tang from buttermilk (or in this case, cream cheese) is what gives red velvet its distinct, hard-to-describe flavor that people can't quite put their finger on but absolutely love.
Conclusion
Every time I pull a tray of red velvet crinkle cookies out of the oven, I get that same happy little feeling. The kitchen smells warm and sweet, the cookies are perfectly puffed and cracked, and Olivia is already hovering nearby waiting for them to cool enough to eat. This recipe has become one of our most-made cookies, and I don't see that changing anytime soon. If you've never made red velvet crinkle cookies from scratch before, I really hope you try this version. The cream cheese in the dough makes them so much richer than any mix version, and the results are honestly stunning.
Grab your ingredients, clear off your counter, and give yourself an afternoon to enjoy the process. These are the kind of cookies that make baking feel like the best possible way to spend a few hours. And if you want to see another take on the classic for inspiration, you can check out the Allrecipes version of red velvet crinkle cookies here to see how home bakers across the country make them their own. Now let's get that dough chilling. Your future self will thank you.
Related
Looking for other recipes like this? Try these:


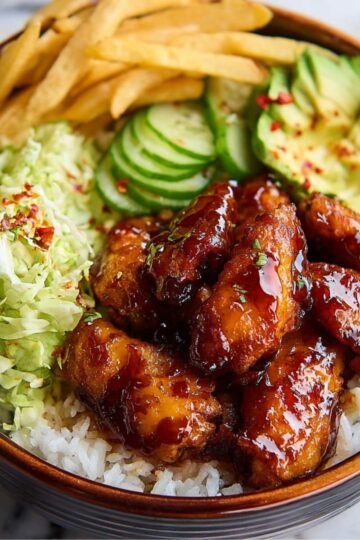
Pairing
These are my favorite dishes to serve with Red Velvet Crinkle Cookies:

📖 Recipe
Red Velvet Crinkle Cookies
Ingredients
Equipment
Method
- In a large bowl, beat the cream cheese and unsalted butter with an electric mixer until smooth and fluffy. I usually let Olivia press the mixer button for a second or two-she thinks it's the most exciting part of baking.
- In a large bowl, beat the cream cheese and unsalted butter with an electric mixer until smooth and fluffy. I usually let Olivia press the mixer button for a second or two-she thinks it's the most exciting part of baking.
- Add the granulated sugar and beat again until the mixture becomes light and creamy. This step helps give the cookies that soft, melt-in-your-mouth texture we love.
- Mix in the egg, vanilla extract, and red gel food coloring until the dough turns a beautiful deep red. Olivia always says this is when the dough starts looking "magical."
- Gradually add the dry ingredients to the wet mixture and mix until a soft dough forms. I remind Olivia not to overmix because we want the cookies soft and tender.
- Cover the bowl and chill the dough in the refrigerator for 2 hours. This helps the cookies keep their shape and create those signature crinkle cracks while baking.
- Preheat the oven to 350°F (175°C) and line baking sheets with parchment paper. Olivia likes placing the parchment sheets-she calls it "setting up the baking stage."
- Scoop about 1½ tablespoons of dough and roll into balls. Roll each ball first in the granulated sugar, then in the powdered sugar until fully coated. Olivia loves this step because it looks like the cookies are playing in snow.
- Place the dough balls on the baking sheet about 2 inches apart and bake for 11-13 minutes until the tops puff up and crack beautifully while the centers stay soft.
- Let the cookies cool on the pan for about 5 minutes, then transfer them to a wire rack. Olivia always sneaks the first warm cookie and declares herself the official taste-tester.

Leave a Reply