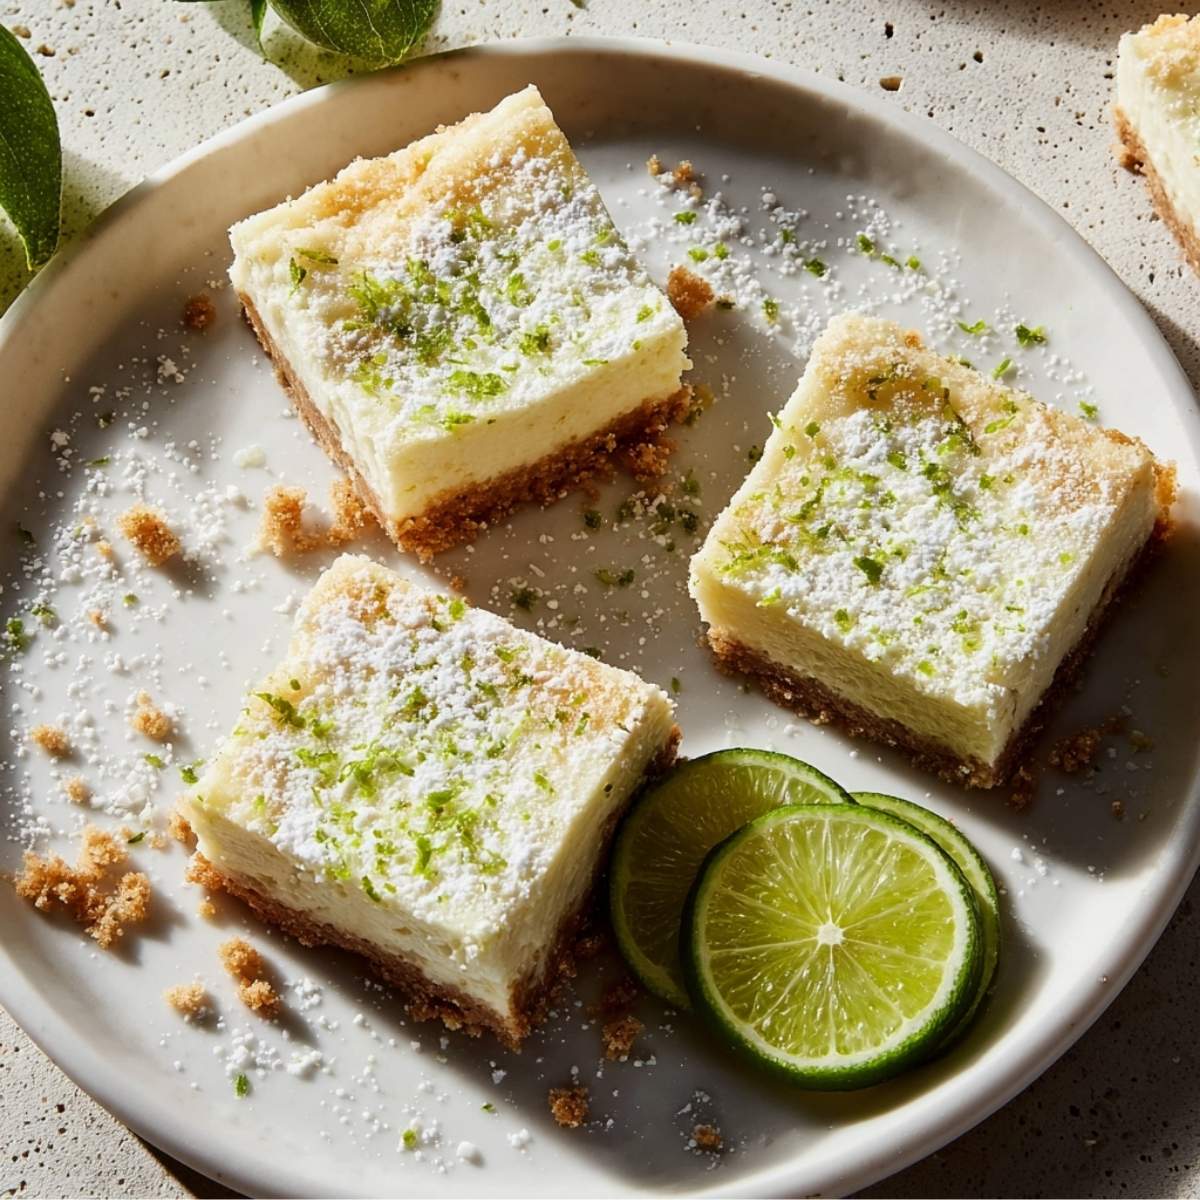
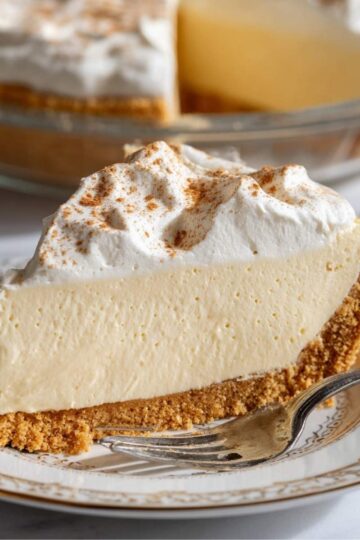
Key lime pie bars are everything you love about a classic key lime pie but in a handheld, easy-to-slice, shareable bar format that is honestly even better for feeding a crowd. We are talking a buttery golden graham cracker crust, a silky smooth key lime custard filling made with sweetened condensed milk and fresh lime zest, and a cloud of whipped cream on top. Every single bite is the perfect balance of sweet, tangy, creamy, and rich, and I promise you these disappear faster than anything else I bring to a gathering.
I make these key lime pie bars every summer without fail, usually the moment I see key limes at the market and get that familiar little thrill. They are my go-to dessert for backyard cookouts, potlucks, and any warm weather gathering where I want to bring something that looks impressive but did not stress me out to make. The filling comes together in minutes, the crust takes ten minutes in the oven, and then the fridge does all the real work for you. That is my kind of dessert.
Jump to:
- Why You'll Love These Key Lime Pie Bars
- Ingredients for Key Lime Pie Bars
- How to Make Key Lime Pie Bars
- My Top Tips for Key Lime Pie Bars
- Little Moments in the Kitchen
- Substitutions for Key Lime Pie Bars
- Variations on Key Lime Pie Bars
- Equipment for Key Lime Pie Bars
- Storage Tips for Key Lime Pie Bars
- Olivia's Tip for Key Lime Pie Bars
- FAQ about Key Lime Pie Bars
- Related
- Pairing
- 📖 Recipe
Why You'll Love These Key Lime Pie Bars
- Simple ingredients, bakery-level results. A buttery graham cracker crust and a four-ingredient filling is genuinely all it takes to make key lime pie bars that taste like they came from a proper dessert shop. No special equipment, no complicated techniques, just real ingredients treated simply.
- Perfect for making ahead and feeding a crowd. These bars need to chill before slicing which means you can and should make them the day before you need them. They slice beautifully cold and hold their shape on a platter, making them one of the best make-ahead summer desserts I know.
- Kid-approved and universally loved. Olivia describes these as "the best thing you make, no contest." The tangy lime flavor with the sweet condensed milk filling hits that perfect sweet-tart balance that makes everyone reach for a second bar before the first one is even finished.
Ingredients for Key Lime Pie Bars
Everything you need for these key lime pie bars is simple and easy to find. The most important thing is using real lime juice and fresh zest rather than bottled lime juice, which makes a noticeable difference in the brightness and freshness of the final flavor.
What You'll Need
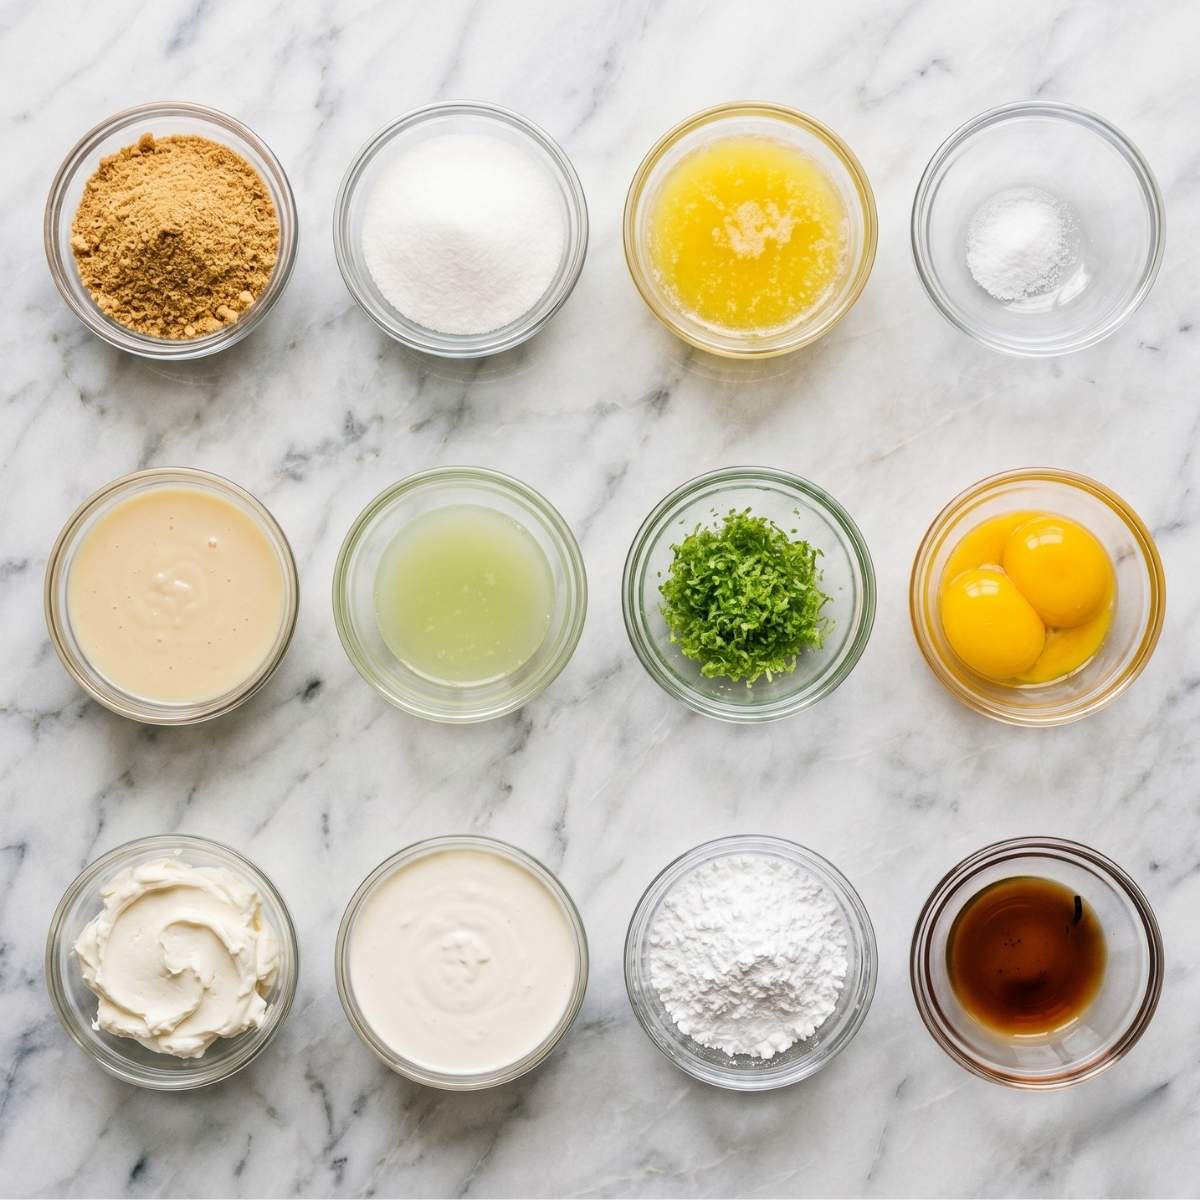
For the Graham Cracker Crust:
- Graham cracker crumbs
- Granulated sugar
- Unsalted butter, melted
- Pinch of salt
For the Key Lime Filling:
- Sweetened condensed milk
- Fresh key lime juice (or regular lime juice)
- Fresh lime zest
- Egg yolks (room temperature)
- Cream cheese, softened (optional but highly recommended)
For the Topping:
- Heavy whipping cream
- Powdered sugar
- Vanilla extract
- Extra lime zest for garnish
Why These Ingredients Matter
- Sweetened condensed milk is the absolute backbone of classic key lime pie bars and there is genuinely no substitute that gives you the same result. It provides the thick, creamy, sweet base that balances the sharp acidity of the lime juice perfectly. The sugars in the condensed milk also react with the lime juice in a way that helps the filling set into that beautiful, sliceable custard texture without needing a water bath or complicated technique.
- Egg yolks are what give these key lime pie bars their gorgeous pale yellow color and their rich, custard-like structure. The yolks set during baking and create that smooth, slightly firm filling that holds its shape when sliced cold. Using room temperature egg yolks is important here because cold yolks do not incorporate as smoothly into the condensed milk mixture and can leave small streaks in your filling.
- Fresh lime zest is the secret ingredient that separates good key lime pie bars from truly great ones. The zest contains the essential oils from the lime skin which carry an intense, aromatic citrus flavor that you simply cannot get from juice alone. Do not skip it and do not be shy with it. The more zest, the brighter and more complex your bars will taste.
How to Make Key Lime Pie Bars
Step-by-Step Directions
- Preheat your oven to 350°F (175°C). Line an 8x8 or 9x9 inch baking pan with parchment paper, leaving some overhang on the sides so you can lift the bars out cleanly after chilling. Lightly grease the parchment with cooking spray.
- Make the graham cracker crust. In a medium bowl, stir together the graham cracker crumbs, granulated sugar, pinch of salt, and melted butter until the mixture looks like wet sand and holds together when you squeeze a small amount in your palm. If it crumbles apart, add a tiny extra drizzle of melted butter.
- Press the crust into the pan. Pour the crumb mixture into your prepared pan and press it into an even, compact layer across the bottom and slightly up the sides. Use the flat bottom of a measuring cup or a glass to press it firmly so it does not crumble when sliced. An even, well-packed crust is what keeps your key lime pie bars from falling apart.
- Bake the crust for 10 minutes until it smells buttery and nutty and looks set and lightly golden at the edges. Remove from the oven and let it cool for 5 minutes while you make the filling. Leave the oven on.
- Make the key lime filling. In a large bowl, beat the softened cream cheese with a hand mixer or whisk until completely smooth with no lumps, about 1 minute. Add the sweetened condensed milk and beat until fully combined and silky. Add the egg yolks one at a time, mixing gently after each addition until just incorporated. Finally, add the fresh key lime juice and lime zest and stir gently until the filling looks smooth, pale yellow, and fragrant.
Pro-Tip: Do not overmix the filling once the lime juice goes in. Overmixing can incorporate too much air which causes the top of your key lime pie bars to crack as they bake. Stir just until everything is combined and smooth.
- Pour the filling over the warm crust. Use a spatula to spread it into an even layer that reaches all the edges of the pan. Tap the pan gently on the counter two or three times to release any air bubbles sitting near the surface.
- Bake for 18 to 22 minutes until the edges look set and the center has just a slight jiggle when you gently shake the pan, similar to a just-set gelatin. The filling should not look liquid or sloshy but should not look completely firm either. It will continue to set as it cools. Do not overbake or the custard texture will be grainy rather than smooth and creamy.
- Cool completely at room temperature for about 1 hour, then transfer to the refrigerator. Chill for a minimum of 3 hours but overnight is ideal. The bars need to be fully cold all the way through before you attempt to slice them or the filling will not hold its shape cleanly.
- Make the whipped cream topping. Just before serving, beat the heavy whipping cream, powdered sugar, and vanilla extract together with a hand mixer on medium-high speed until stiff peaks form and the cream holds its shape when you lift the beater. The cream should look fluffy, bright white, and hold a firm peak that curls slightly at the tip.
- Lift, slice, and top. Use the parchment paper overhang to lift the entire slab out of the pan onto a cutting board. Slice into bars with a sharp knife, wiping the blade clean between cuts for neat edges. Top each bar with a dollop of whipped cream and a small pinch of fresh lime zest right before serving.
Hint: For the cleanest possible slices, dip your knife in hot water and wipe it dry between every single cut. The warm blade glides through the cold filling without dragging or tearing.
These key lime pie bars are the kind of dessert that pairs perfectly with a cozy winter treat too. If you love a good dessert bar, my Eggnog Pie is a must-make for the holiday season and follows the same easy make-ahead philosophy.
My Top Tips for Key Lime Pie Bars
The number one thing that makes or breaks these key lime pie bars is the chill time. I know it is tempting to slice into them after just an hour in the fridge but please do not. The filling needs the full overnight chill to firm up completely, develop its flavor, and slice with those clean, beautiful edges that make these bars look as good as they taste. Patience here is genuinely rewarded.
Gold Tip: Use a microplane or the fine side of a box grater for your lime zest and zest the limes before you juice them. Once you cut and squeeze a lime the fruit collapses and becomes almost impossible to zest cleanly. Zest first, always, and get every bit of that fragrant green outer layer because that is where the most intense lime flavor lives.
Little Moments in the Kitchen
I was zesting limes at the counter last summer while Olivia sat on the counter next to me doing her homework, and she looked over and asked why I was "scratching the limes." I explained that the zest is where the strongest lime flavor hides and that without it the bars would taste flat and less interesting. She considered this for a moment and then said, "So the lime has a secret inside it." Yes, Olivia. Exactly that.
The funniest part came later when she was helping me press the graham cracker crust into the pan and got so enthusiastic about packing it down firmly that she pressed a small crack straight through the parchment paper. We patched it, laughed about it, and the crust turned out perfectly. She then stood in front of the oven for the entire bake time watching the filling set like it was the most fascinating thing she had ever witnessed. When we finally sliced them the next day she took one bite, closed her eyes, and said "these are better than the ones at that cafe." That is the highest possible praise and I wrote it down immediately.
Substitutions for Key Lime Pie Bars
- Key lime juice: Regular Persian lime juice works perfectly as a 1:1 swap if you cannot find key limes. The flavor is slightly less floral and a touch more straightforward but still absolutely delicious. Bottled key lime juice also works in a pinch, though fresh always gives a brighter result.
- Graham cracker crust: Swap graham crackers for digestive biscuits, vanilla wafers, or gingersnap cookies for a different flavor base. Gingersnap crust with key lime filling is an incredible combination that I highly recommend trying at least once.
- Cream cheese: This is optional in the filling but it adds a beautiful tang and a slightly denser, more stable texture. If you leave it out the bars are softer and more traditionally custardy. If you include it they are firmer, richer, and easier to slice cleanly.
- Egg yolks: For a no-bake version of these key lime pie bars skip the eggs entirely and use extra cream cheese to stabilize the filling instead. The texture will be slightly different but still creamy and delicious.
- Whipped cream: Store-bought whipped topping works fine if you are short on time. Just add it right before serving since it weeps and deflates faster than freshly whipped cream.
Variations on Key Lime Pie Bars
- No-bake key lime pie bars: Mix the condensed milk, cream cheese, lime juice, and zest together until smooth and thick, pour over a pressed and chilled graham cracker crust, and freeze for 2 hours instead of baking. These no-bake key lime pie bars are frozen, fudgy, and absolutely incredible on a hot day. Slice them straight from the freezer for clean cuts and serve immediately.
- Chocolate dipped key lime bars: Once the bars are fully chilled and sliced, dip the bottom half of each bar into melted dark chocolate and set on parchment paper until the chocolate hardens. The bittersweet chocolate with the tangy lime custard is a combination that sounds unusual and tastes absolutely spectacular. These make a stunning dessert platter addition for parties.
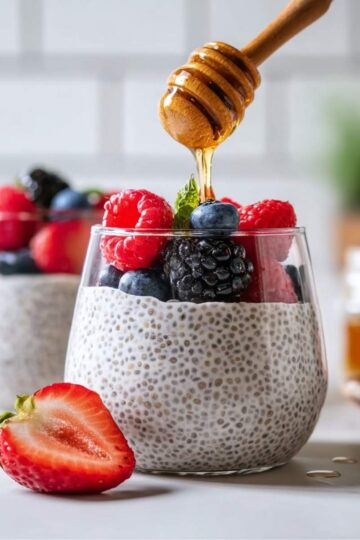
- Coconut key lime bars: Add ¼ cup of toasted shredded coconut to the graham cracker crust mixture and press as directed. Sprinkle more toasted coconut over the filling before baking. This variation gives the bars a tropical, slightly chewy character that pairs beautifully with the bright lime flavor. Serve alongside a jar of my Chia Pudding for a full tropical themed dessert spread.
Equipment for Key Lime Pie Bars
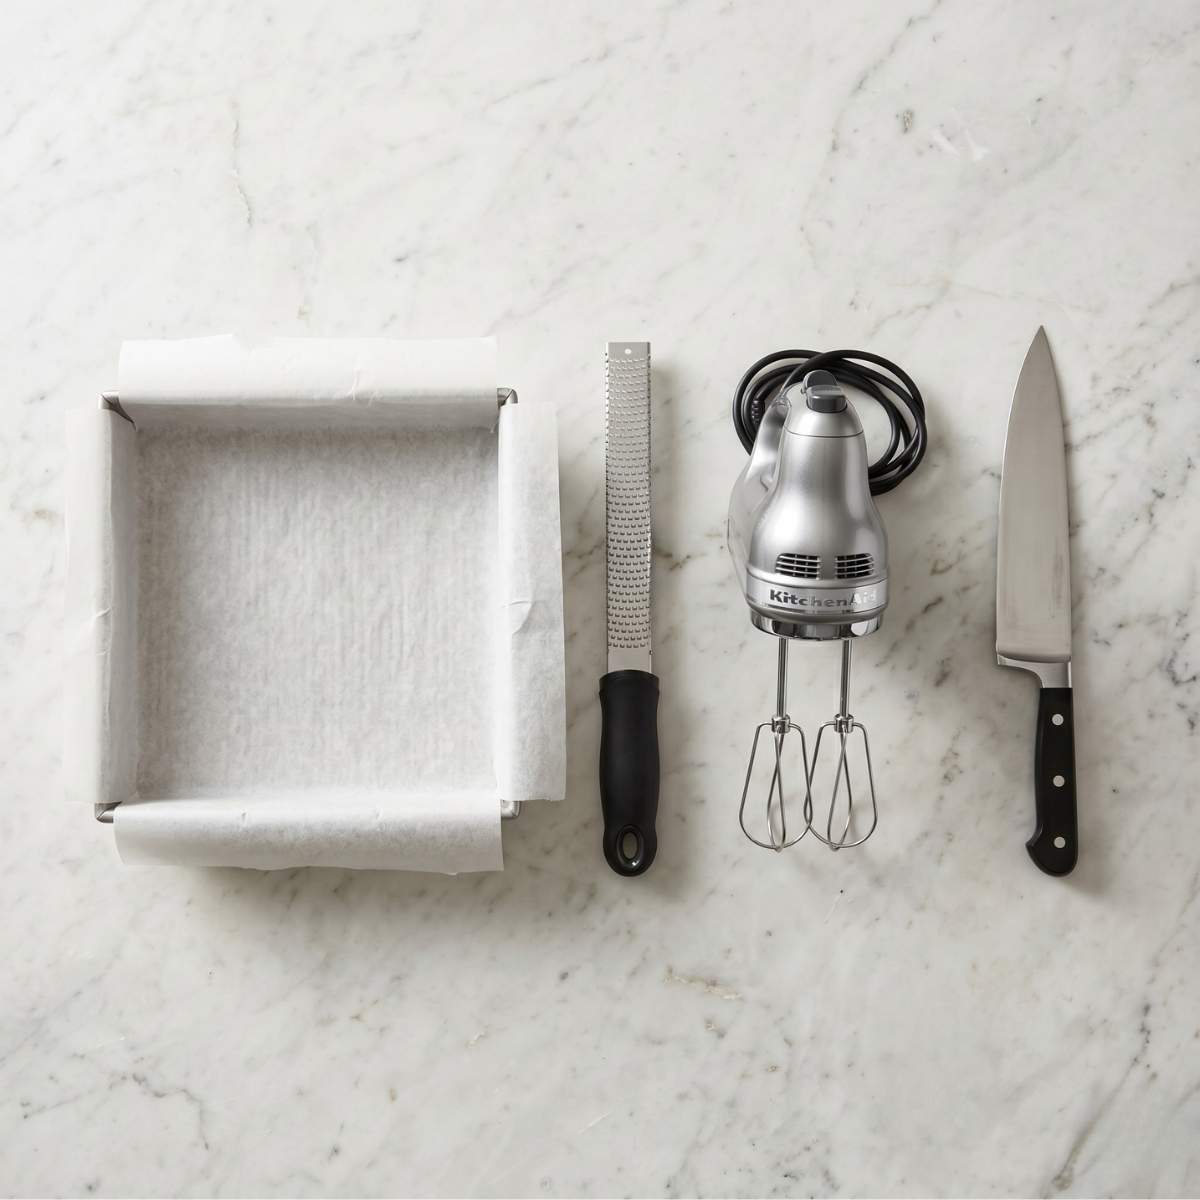
- 8x8 or 9x9 inch baking pan: The standard size for this recipe. An 8x8 pan gives you thicker, taller bars with more filling in each bite. A 9x9 gives you slightly thinner bars that chill and slice a little faster. Both work beautifully.
- Parchment paper with overhang: Non-negotiable for easy, clean removal. Without it you will struggle to get the bars out of the pan without breaking them.
- Microplane or fine grater: Essential for getting the fine, fragrant lime zest that makes such a big difference in the final flavor of these key lime pie bars.
- Hand mixer or stand mixer: For beating the cream cheese smooth and for whipping the cream. You can do both by hand with a whisk but it takes significantly more effort and time.
- Sharp chef's knife: For slicing clean, beautiful bars. Wipe it between every cut for professional-looking results.
Storage Tips for Key Lime Pie Bars
- Fridge: Store cut bars in an airtight container or cover the pan tightly with plastic wrap. Keep in the refrigerator for up to 4 days. Add the whipped cream topping only to bars you are serving immediately, not to the ones going back in the fridge, as it softens and weeps over time.
- Freezer: These key lime pie bars freeze beautifully without the whipped cream topping. Arrange the cut bars in a single layer on a parchment-lined sheet pan and freeze until solid, about 2 hours, then transfer to a freezer-safe container with parchment between layers. They keep for up to 2 months. Thaw overnight in the refrigerator and top with fresh whipped cream before serving.
- Make-ahead tip: These bars are genuinely better the next day after a full overnight chill. The filling firms up perfectly, the flavors deepen and meld together, and the crust holds its texture without getting soggy. Make them the day before you need them every single time.
My Brown Sugar Rhubarb Cookies store just as well and make a wonderful pairing on a dessert platter if you are planning a gathering and want a variety of make-ahead sweet options.
Olivia's Tip for Key Lime Pie Bars
Olivia says these key lime pie bars taste best when they are extremely cold, eaten straight from the fridge with extra whipped cream and a tiny bit more lime zest on top. She also says the corner pieces are the best pieces because you get more crust in every bite and she would like it known that she calls dibs on both corner pieces every single time. Noted and accepted.
FAQ about Key Lime Pie Bars
What is the best crust for key lime bars?
A classic buttery graham cracker crust is the most traditional and most beloved base for key lime pie bars and for very good reason. The slightly sweet, honey-flavored crunch of the graham cracker is the perfect counterpart to the tangy citrus filling. That said, gingersnap crust is a close second and adds a warm spiced note that plays beautifully with the lime. Vanilla wafer crust is a milder option that lets the lime flavor take complete center stage.
What gives key lime bars their flavor?
The combination of fresh key lime juice and fresh lime zest is what creates that signature bright, tangy, intensely citrusy flavor. The juice provides the tartness and the acidity that makes your mouth water, while the zest provides the aromatic essential oils that give key lime pie bars that distinctive floral, almost perfumed lime quality. Together with the rich sweetness of condensed milk they create that unmistakable sweet-tart balance that makes this dessert so addictive.
What are the ingredients in key lime bars?
At their most basic, key lime pie bars need five things: graham cracker crumbs, butter, sweetened condensed milk, fresh lime juice, and egg yolks. My version also includes cream cheese for extra stability and flavor, lime zest for maximum citrus punch, and a fresh whipped cream topping. That is it. Simple, classic, and completely delicious.
What is the secret to key lime pie?
There are two secrets that most people do not know. The first is using plenty of fresh lime zest alongside the juice because the zest is where the most intense and complex citrus flavor actually lives. The second is not overbaking. Key lime filling should come out of the oven with a slight jiggle in the center and finish setting in the refrigerator. Overbaking makes the custard grainy and tight instead of smooth and creamy. Pull it early and trust the chill.
Conclusion
These easy key lime pie bars are one of those recipes that earns a standing request from everyone who tries them. The buttery graham cracker crust, the silky tangy condensed milk filling, the cloud of fresh whipped cream on top. It is a combination that is genuinely hard to improve on, and the bar format makes them so easy to serve, transport, and share. Whether you make them for a summer cookout, a holiday dessert table, or just because you spotted key limes at the market and could not resist, these bars deliver every single time.
I hope you love making these key lime pie bars as much as Olivia and I do, corner pieces and all. Come back and leave a comment telling me which variation you tried first! And if you want even more inspiration for citrus-forward bar desserts, the community at Allrecipes has a fun margarita bar recipe with a similar flavor profile that is absolutely worth checking out too.
Related
Looking for other recipes like this? Try these:

Pairing
These are my favorite dishes to serve with key lime pie bars:
📖 Recipe
Easy Key Lime Pie Bars
Ingredients
Equipment
Method
- Preheat your oven to 350°F (175°C). Line your baking pan with parchment paper. I always let Olivia help press it into the corners, it doesn't have to be perfect, and she loves being part of the setup.
- In a bowl, mix the graham cracker crumbs, granulated sugar, unsalted butter, and salt until it feels like damp sand. Olivia loves squeezing a handful to "test" it, if it holds together, you're good to go.
- Press the mixture firmly into the pan. I use a glass to smooth it out, and Olivia always insists on "double pressing" to make it extra strong.
- Bake for 10 minutes until lightly golden and fragrant. The kitchen will smell like butter and honey, this is usually when Olivia wanders back in asking if it's ready yet.
- Beat the cream cheese until smooth, then mix in the sweetened condensed milk. Add the egg yolks one at a time, then gently stir in the key lime juice and lime zest. I remind Olivia to stir slowly here, too much mixing makes cracks later.
- Pour the filling over the warm crust and smooth it out. Tap the pan gently to remove bubbles, Olivia calls this the "magic knock."
- Bake for 18-22 minutes until the edges are set and the center has a slight jiggle. I always tell Olivia, "It should wobble like jelly, not wave like water."
- Let the bars cool at room temperature, then refrigerate for at least 3 hours. This is the hardest part for us, we check the fridge more times than I can count.
- Whip the heavy cream, powdered sugar, and vanilla extract until stiff peaks form. Olivia loves watching it transform into fluffy clouds, it never gets old.
- Lift the bars out, slice cleanly, and top with whipped cream and lime zest. Olivia always claims the corner pieces, they have the most crust, and honestly, she's not wrong.
Nutrition
Notes
- For a no-bake version, skip the eggs and add extra cream cheese for stability.
- Use fresh lime juice and zest for the brightest flavor, bottled just isn't the same.
- Store in the fridge for up to 4 days or freeze for up to 2 months (without topping).
- Try a gingersnap crust for a warm, spiced twist.
- These bars are even better the next day after chilling overnight.

Leave a Reply