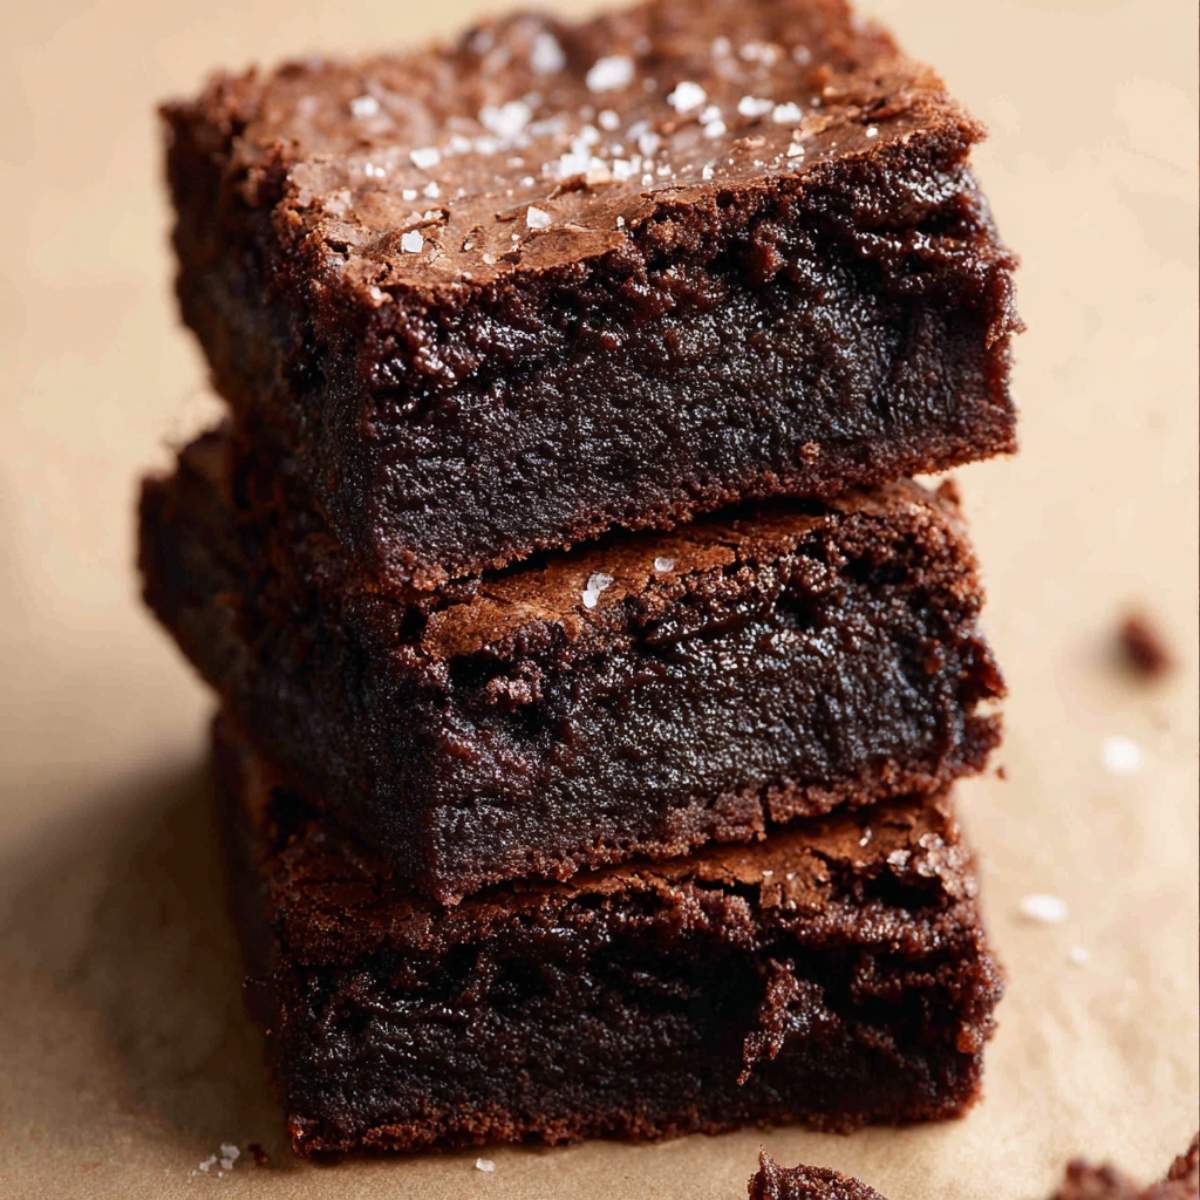
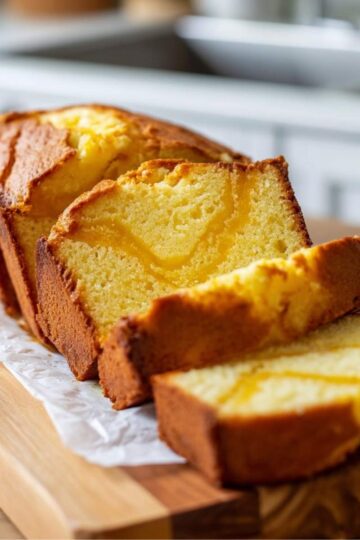
Espresso brownies are what happens when you take already perfect fudgy brownies and add a deep, rich shot of coffee flavor that makes every single bite taste more intense and more chocolatey. These are thick, gooey in the middle, with crackly tops and chewy edges, and the espresso doesn't make them taste like coffee, it just makes the chocolate taste like the best version of itself.
I make these espresso brownies constantly because they're shockingly easy, they use ingredients I always have on hand, and every time I bring them anywhere, people ask for the recipe. These are the kind of dessert that makes you look like you know what you're doing in the kitchen, even though they come together in one bowl in about 10 minutes.
Jump to:
- Why You'll Love These Espresso Brownies
- Ingredients for Espresso Brownies
- How to Make Espresso Brownies
- My Top Tips for Espresso Brownies
- Little Moments in the Kitchen
- Substitutions for Espresso Brownies
- Variations on Espresso Brownies
- Equipment for Espresso Brownies
- Storage Tips for Espresso Brownies
- Olivia's Tip for Espresso Brownies
- FAQ about Espresso Brownies
- Conclusion
- Related
- Pairing
- 📖 Recipe
Why You'll Love These Espresso Brownies
- They're intensely chocolatey without being overly sweet. The espresso powder deepens the chocolate flavor and cuts through the sweetness in a way that makes these brownies taste complex and sophisticated.
- They're ridiculously fudgy. We're talking gooey centers, crackly tops, and chewy edges, the holy trinity of brownie texture.
- They're a one-bowl recipe. No mixer required, just a whisk, a bowl, and about 10 minutes of your time before they go in the oven.
Ingredients for Espresso Brownies
This ingredient list is short, simple, and probably already sitting in your pantry right now. The espresso powder is the only thing that might be new, but once you have it, you'll start adding it to everything chocolate.
What You'll Need
- ½ cup (1 stick) unsalted butter
- 1 cup granulated sugar
- 2 large eggs, at room temperature
- 1 teaspoon vanilla extract
- ⅓ cup unsweetened cocoa powder (Dutch-processed if you have it)
- ½ cup all-purpose flour
- 2 tablespoons instant espresso powder
- ¼ teaspoon salt
- ½ cup semisweet chocolate chips (optional but highly recommended)
- Flaky sea salt for topping (optional)
Why These Ingredients Matter
- Instant espresso powder: This is the secret ingredient that makes these espresso brownies taste so rich and deeply chocolatey. Espresso powder doesn't make the brownies taste like coffee, it amplifies the chocolate flavor and adds a subtle complexity that makes people wonder what your secret is. You can find it in the coffee aisle at most grocery stores, and a little jar lasts forever.
- Dutch-processed cocoa powder: If you have it, use it. Dutch-processed cocoa has a smoother, less acidic flavor than natural cocoa, which makes the brownies taste darker and more intense. If you only have natural cocoa powder, it still works beautifully, the flavor will just be slightly brighter.
- Room temperature eggs: Cold eggs don't incorporate as smoothly into the batter, and you can end up with a denser, heavier brownie. Letting your eggs sit on the counter for 20 minutes before you start makes a real difference in the final texture.
How to Make Espresso Brownies
Step-by-Step Directions
1. Preheat and prep your pan. Preheat your oven to 350°F. Line an 8x8-inch baking pan with parchment paper, leaving some overhang on the sides so you can easily lift the brownies out later, and lightly grease the parchment with butter or cooking spray.
2. Brown the butter and bloom the espresso. In a medium saucepan, melt the butter over medium heat, swirling the pan occasionally. Continue cooking for 5 to 7 minutes, watching closely, until the butter turns golden brown and starts to smell nutty and toasted. You'll see little brown bits forming at the bottom of the pan, that's the milk solids caramelizing and creating all that deep, nutty flavor.
Remove the pan from the heat immediately and stir in the espresso powder while the butter is still hot. Let the espresso bloom in the hot brown butter for 30 seconds, stirring constantly, until it smells incredibly rich and aromatic. This step unlocks the full flavor of the espresso and infuses it directly into the butter.
3. Whisk in the sugar. Add the granulated sugar to the brown butter and espresso mixture and whisk vigorously for about 1 minute until the mixture looks smooth, glossy, and slightly lighter in color. This is when I always call Olivia over to help whisk because she loves seeing the batter transform. She gets so excited watching it go from grainy to smooth, and she knows this step is what creates that signature crackly top on the brownies.
4. Add the eggs and vanilla. Crack the eggs directly into the butter and sugar mixture, add the vanilla extract, and whisk everything together for about 30 seconds until the batter looks thick, smooth, and fully combined. The mixture should be glossy and ribbony at this point.
5. Stir in the dry ingredients. In a small bowl, whisk together the cocoa powder, flour, and salt until there are no lumps. Add the dry ingredients to the wet ingredients and stir gently with a wooden spoon or spatula just until the flour disappears and the batter looks uniform. Do not overmix, a few small streaks of flour are fine. We intentionally left out baking powder in this recipe because it helps keep the center super fudgy instead of cakey.
6. Fold in the chocolate chips. If you're using chocolate chips, fold them into the batter gently with a spatula. This is optional, but I highly recommend it because pockets of melted chocolate scattered throughout the espresso brownies take them to the next level.
7. Bake until set. Pour the batter into your prepared pan and spread it out evenly with a spatula. Bake for 25 to 30 minutes, until the top looks crackly and set and a toothpick inserted into the center comes out with a few moist crumbs but no wet batter. Do not overbake, you want these fudgy, not cakey.
8. Cool completely before cutting. Let the brownies cool in the pan for at least 30 minutes, then use the parchment overhang to lift them out onto a cutting board. Let them cool completely before slicing, at least another 30 minutes. If you try to cut them while they're still warm, they'll fall apart and turn into a delicious mess.
Hint: For the cleanest cuts, use a sharp knife and wipe it clean between each slice. Warm the knife under hot water, dry it off, slice, then repeat. This keeps the edges sharp and prevents dragging the fudgy center.
My Top Tips for Espresso Brownies
The single biggest mistake people make with brownies is overbaking them. You want the toothpick to come out with a few moist crumbs clinging to it, not bone dry. The brownies will continue to set as they cool, so if you wait until they look fully done in the oven, they'll be dry and cakey by the time you eat them.
Gold Tip: Blooming the espresso powder directly in the hot brown butter is a professional technique that completely transforms the flavor. When espresso powder hits hot fat, it releases all its aromatic oils and deepens the flavor in a way that just stirring it into the dry ingredients can't match. This one extra step takes your espresso brownies from good to truly unforgettable.
Little Moments in the Kitchen
The first time I made these espresso brownies, I was testing out the recipe for a bake sale at Olivia's school. She came into the kitchen right when I was browning the butter, and she stopped in her tracks and said, "Mom, why does it smell like popcorn and cookies at the same time?" I explained to her that browning butter creates this nutty, caramel-like aroma that makes everything taste richer, and she was completely fascinated watching the butter change from yellow to golden brown.
When it came time to whisk in the sugar, she insisted on doing it herself because she wanted to be the one to make the crackly top happen. After the brownies cooled and I sprinkled flaky sea salt on top, she tried one and gave me her brutally honest feedback, "The salt makes them taste fancy, but also I think you should put more salt next time because I like when it crunches. " So now we always add extra sea salt, and honestly, she was right.If you love easy, one-bowl desserts that taste way fancier than the effort you put in, my Ground Turkey and Zucchini Skillet is another weeknight favorite that comes together fast.
Substitutions for Espresso Brownies
No espresso powder: Use 2 tablespoons of very finely ground coffee or instant coffee granules. The flavor won't be quite as smooth, but it still works. You can also skip it entirely and just make regular brownies, they'll still be delicious.
Gluten-free: Swap the all-purpose flour for a 1-to-1 gluten-free baking flour. The texture will be slightly different but still fudgy and delicious.
Dairy-free: Use vegan butter or coconut oil instead of regular butter. Make sure your chocolate chips are dairy-free if you're adding them.
No chocolate chips: These are perfectly delicious without the chocolate chips. You can also swap them for chopped walnuts, pecans, or even white chocolate chips if you want a completely different flavor profile.
Regular butter: If you don't want to brown the butter, you can use regular melted butter. You'll lose some of that deep, nutty complexity, but the espresso brownies will still taste amazing.
Variations on Espresso Brownies
Espresso glaze: Make a simple glaze by whisking together 1 cup powdered sugar, 2 tablespoons strong brewed espresso, and 1 tablespoon melted butter until smooth. Drizzle it over the cooled brownies and let it set for 15 minutes. The glaze adds a glossy finish and an extra hit of coffee flavor.
Mocha ganache topping: Heat ½ cup heavy cream until it just starts to simmer, then pour it over 4 oz chopped dark chocolate and 1 teaspoon espresso powder. Stir until smooth and glossy, then pour it over the cooled brownies and let it set for 30 minutes.
With sea salt: Sprinkle flaky sea salt over the top of the batter right before baking. The salt cuts through the sweetness and makes the chocolate flavor pop even more.
Peppermint espresso: Add ½ teaspoon peppermint extract to the batter along with the vanilla. Top with crushed candy canes or peppermint bark pieces for a holiday twist.
For more comforting, crowd-pleasing recipes that disappear fast, my Crack Chicken Noodle Soup is another one that always gets rave reviews.
Equipment for Espresso Brownies
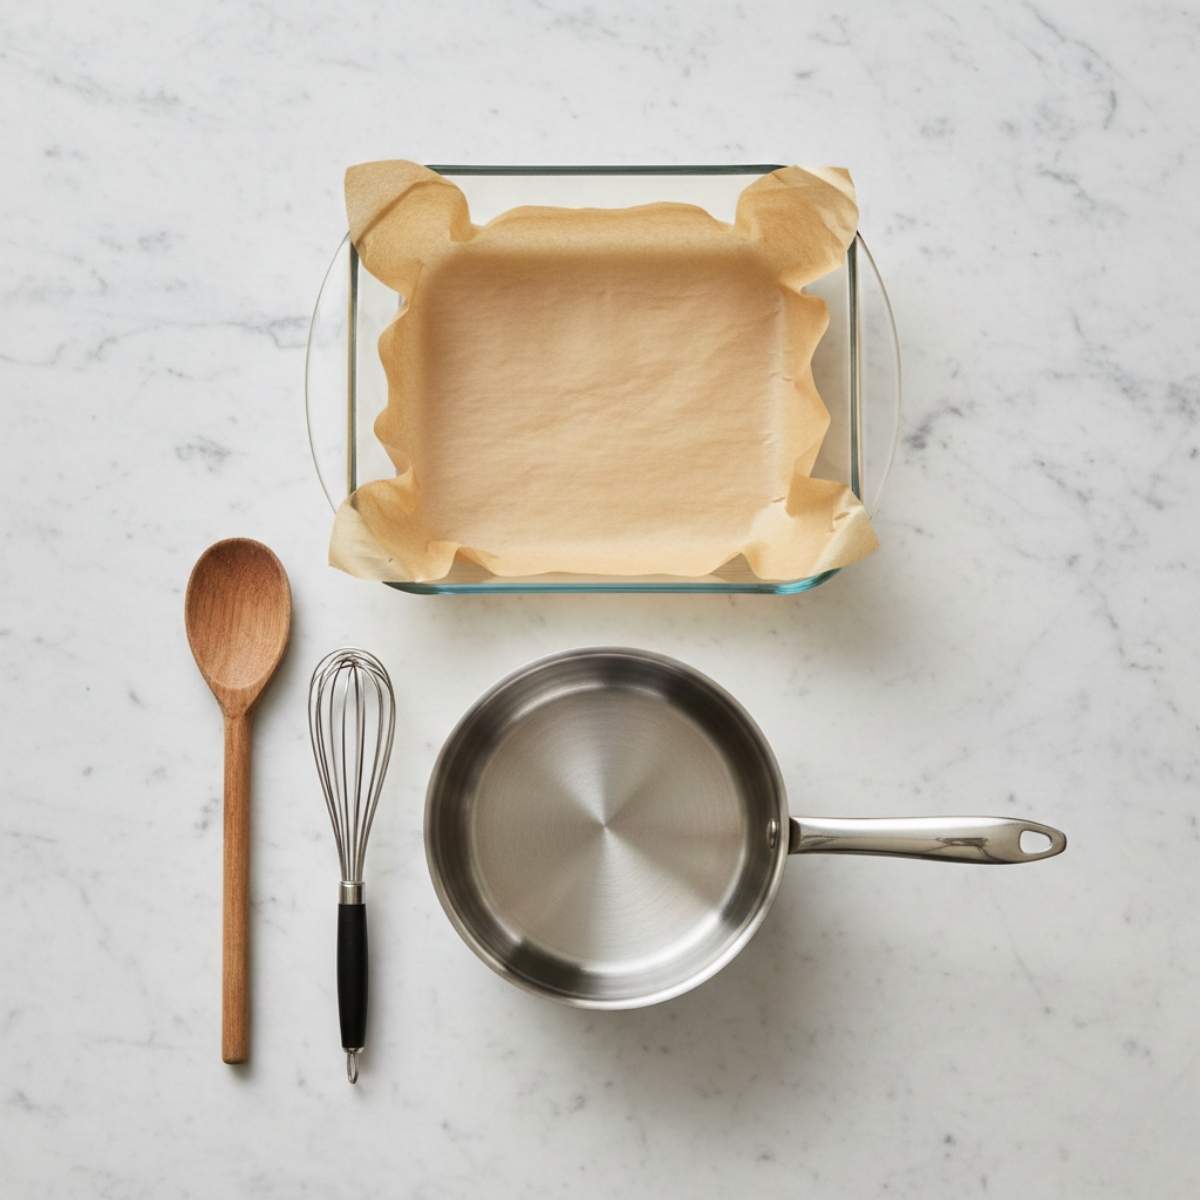
8x8-inch baking pan: This is the standard size for brownie recipes. A 9x9-inch pan will work in a pinch, but your brownies will be slightly thinner and will bake faster, so check them a few minutes earlier.
Parchment paper: Lining your pan with parchment makes it so much easier to lift the brownies out cleanly without having to dig them out with a spatula. Leave some overhang on the sides to use as handles.
Medium saucepan: For browning the butter on the stovetop. This is essential for watching the butter change color and catching it at exactly the right moment before it burns.
Whisk and wooden spoon: A whisk is essential for getting the sugar and eggs fully incorporated, and a wooden spoon or spatula is perfect for gently folding in the dry ingredients without overmixing.
Storage Tips for Espresso Brownies
- Room temperature: Store in an airtight container at room temperature for up to 4 days. They actually taste better on day two and three once the flavors have had time to settle.
- Fridge: If your kitchen is very warm, you can store them in the fridge for up to a week. Let them come to room temperature before serving for the best texture.
- Freezing: Wrap individual brownies tightly in plastic wrap, then place them in a freezer-safe bag or container. Freeze for up to 3 months. Thaw at room temperature for about 30 minutes before eating, or microwave for 10 to 15 seconds for a warm, gooey treat.
- Make-ahead: You can make the batter up to 24 hours ahead, cover it tightly, and store it in the fridge. Let it come to room temperature for 20 minutes before baking, and add an extra 2 to 3 minutes to the bake time.
Olivia's Tip for Espresso Brownies
"Put them in the microwave for 10 seconds before you eat them. They get all warm and melty and the chocolate chips get gooey again." Olivia discovered this completely by accident when she reheated a brownie that had been in the fridge, and now it's the only way she'll eat them. Honestly, she's right, a quick zap in the microwave makes these taste like they just came out of the oven.
FAQ about Espresso Brownies
Can I add espresso to my brownies?
Yes, absolutely. Adding instant espresso powder to brownies is one of the best baking tricks out there. It doesn't make the brownies taste like coffee, it just intensifies the chocolate flavor and adds a deeper, richer complexity that makes them taste more sophisticated.
Why do people put espresso powder in brownies?
Espresso powder enhances and deepens the chocolate flavor without adding a coffee taste. It works the same way a pinch of salt makes sweet things taste sweeter, the espresso makes chocolate taste more chocolatey. It's a professional baker's secret that makes homemade brownies taste like they came from a fancy bakery.
What does putting coffee in brownies do?
Coffee, or more specifically espresso powder, amplifies the cocoa flavor and makes the brownies taste richer and more intense. It also adds a subtle bitterness that balances out the sweetness and keeps the brownies from tasting flat or one-dimensional.
What is in a Killer brownie?
A Killer Brownie is a brand of thick, fudgy brownies with mix-ins like caramel, walnuts, or peanut butter. While these espresso brownies aren't a copycat, they share that same ultra-fudgy texture and intense chocolate flavor that makes Killer Brownies so popular.
Conclusion
These espresso brownies are hands down one of the best brownie recipes I've ever made. They're fudgy, rich, intensely chocolatey, and so easy to make that I can whip them up on a random Tuesday without even thinking about it. The espresso powder is the secret ingredient that takes them from good to unforgettable, and once you try them, you'll never make brownies without it again.
If you're building out your dessert recipe collection, my Zucchini Noodle Chicken Alfredo is a weeknight favorite worth adding to your rotation.And if you want to explore another quick and indulgent chocolate treat, Quick and Easy Brownies on Allrecipes is a crowd-pleasing recipe worth bookmarking. Happy baking, friends!
Related
Looking for other recipes like this? Try these:


Pairing
These are my favorite dishes to serve with Espresso Brownies:


📖 Recipe
Fudgy Espresso Brownies
Ingredients
Equipment
Method
- Preheat your oven to 350°F. Line your 8x8 pan with parchment paper. Olivia calls these "brownie handles", it makes it so much easier to lift them out later!
- Melt the unsalted butter in a saucepan over medium heat until it turns golden and smells nutty. Immediately stir in the instant espresso powder. Watching the espresso "bloom" in the hot butter is like magic, the kitchen will smell incredible!
- Pour the butter mixture into a bowl and whisk in the granulated sugar vigorously for 1 minute. This is Olivia's "workout" step, beating the sugar into the hot butter is what gives us that beautiful, shiny, crackly top.
- Whisk in the eggs one at a time, followed by the vanilla extract. The batter should look glossy and smooth, almost like a thick chocolate ribbon.
- Gently fold in the cocoa powder, all-purpose flour, and salt using a spatula. I always tell Olivia: "Be gentle!" We don't want to overmix, or they'll lose that fudgy middle we're dreaming of.
- Stir in the semisweet chocolate chips if you're using them. Pour the batter into the pan and sprinkle with a little flaky sea salt to make the flavors truly sing.
- Bake for 25-30 minutes. You want a toothpick to come out with a few moist crumbs. "Don't overbake!" is our golden rule. Let them cool completely, if you can wait that long!
Nutrition
Notes
- The Secret to Clean Cuts: For those perfect squares you see in photos, chill the brownies in the fridge for an hour before slicing with a hot knife.
- Storage: Keep these in an airtight container at room temperature for up to 4 days, though in our house, they rarely last 24 hours!
- Olivia's Serving Suggestion: Serve these warm with a scoop of vanilla bean ice cream for a "fancy" Friday night treat.


Leave a Reply