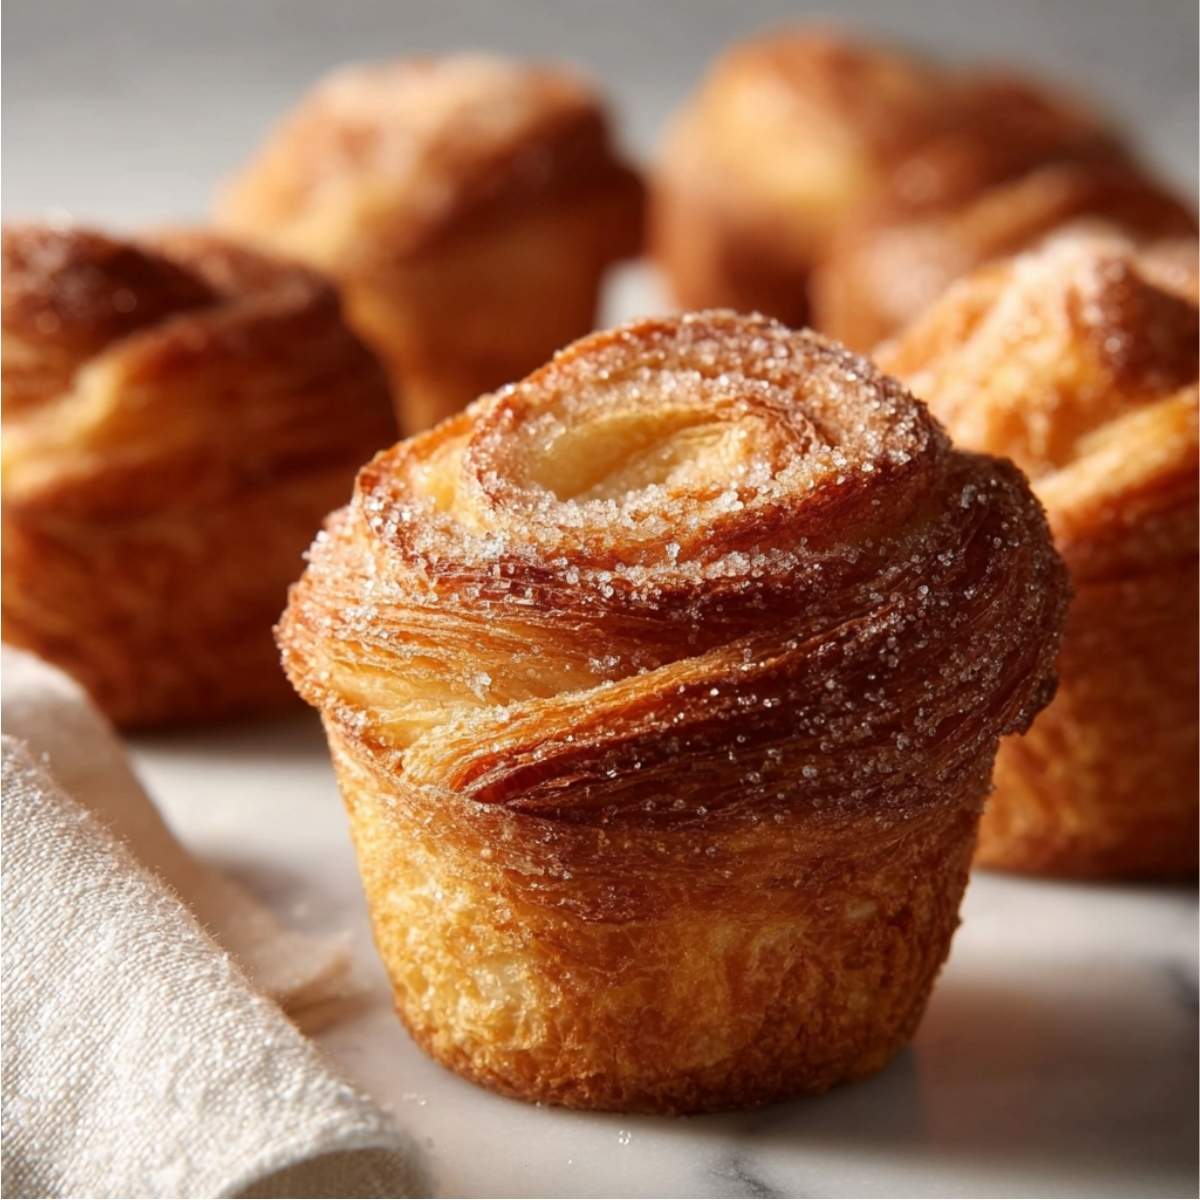
Gluten free cruffins are the kind of baked treat that makes people stop mid-bite and ask you what you just made. They are a croissant muffin hybrid pastry with flaky, buttery spiral layers on the inside and a crispy, cinnamon sugar coating on the outside, all baked right in a muffin tin. They look impossibly impressive, taste like something from a fancy bakery, and yes, they are completely gluten-free. Nobody will guess it for a single second.
I started developing this gluten free cruffins recipe because Olivia had seen cruffins at a bakery downtown and was devastated when I told her we couldn't just grab one off the shelf. I told her we would make our own at home and make them better. That was a bold promise, but after several rounds of testing in this kitchen, I genuinely think we delivered. These have become our most requested weekend baking project and I am so excited to share them with you.
Jump to:
- Why You'll Love These Gluten Free Cruffins
- Ingredients for Gluten Free Cruffins
- How to Make Gluten Free Cruffins
- My Top Tips for Gluten Free Cruffins
- Little Moments in the Kitchen
- Substitutions for Gluten Free Cruffins
- Variations on Gluten Free Cruffins
- Equipment for Gluten Free Cruffins
- Storage Tips for Gluten Free Cruffins
- Olivia's Tip for Gluten Free Cruffins
- FAQ About Gluten Free Cruffins
- Conclusion
- Related
- Pairing
- 📖 Recipe
Why You'll Love These Gluten Free Cruffins
- They look and taste like a real bakery pastry. The flaky buttery layers spiral, the cinnamon sugar coating caramelizes in the oven, and the finished gluten free cruffins look genuinely stunning coming out of the muffin tin. Nobody at your table will believe they are gluten-free and homemade at the same time.
- The technique is easier than it looks. Yes, there are a few steps involved. But each one is straightforward and completely doable for a home baker. The cinnamon roll style rolling technique is the same motion you already know. The spiral shaping method is just coiling the dough strip into the muffin tin. That's it.
- They work for breakfast, brunch, or dessert. Serve them warm from the oven with butter and honey for a cozy weekend breakfast. Bring them to a party as a gluten-free snack that impresses everyone. Dust them with powdered sugar and serve alongside coffee for a proper afternoon treat.
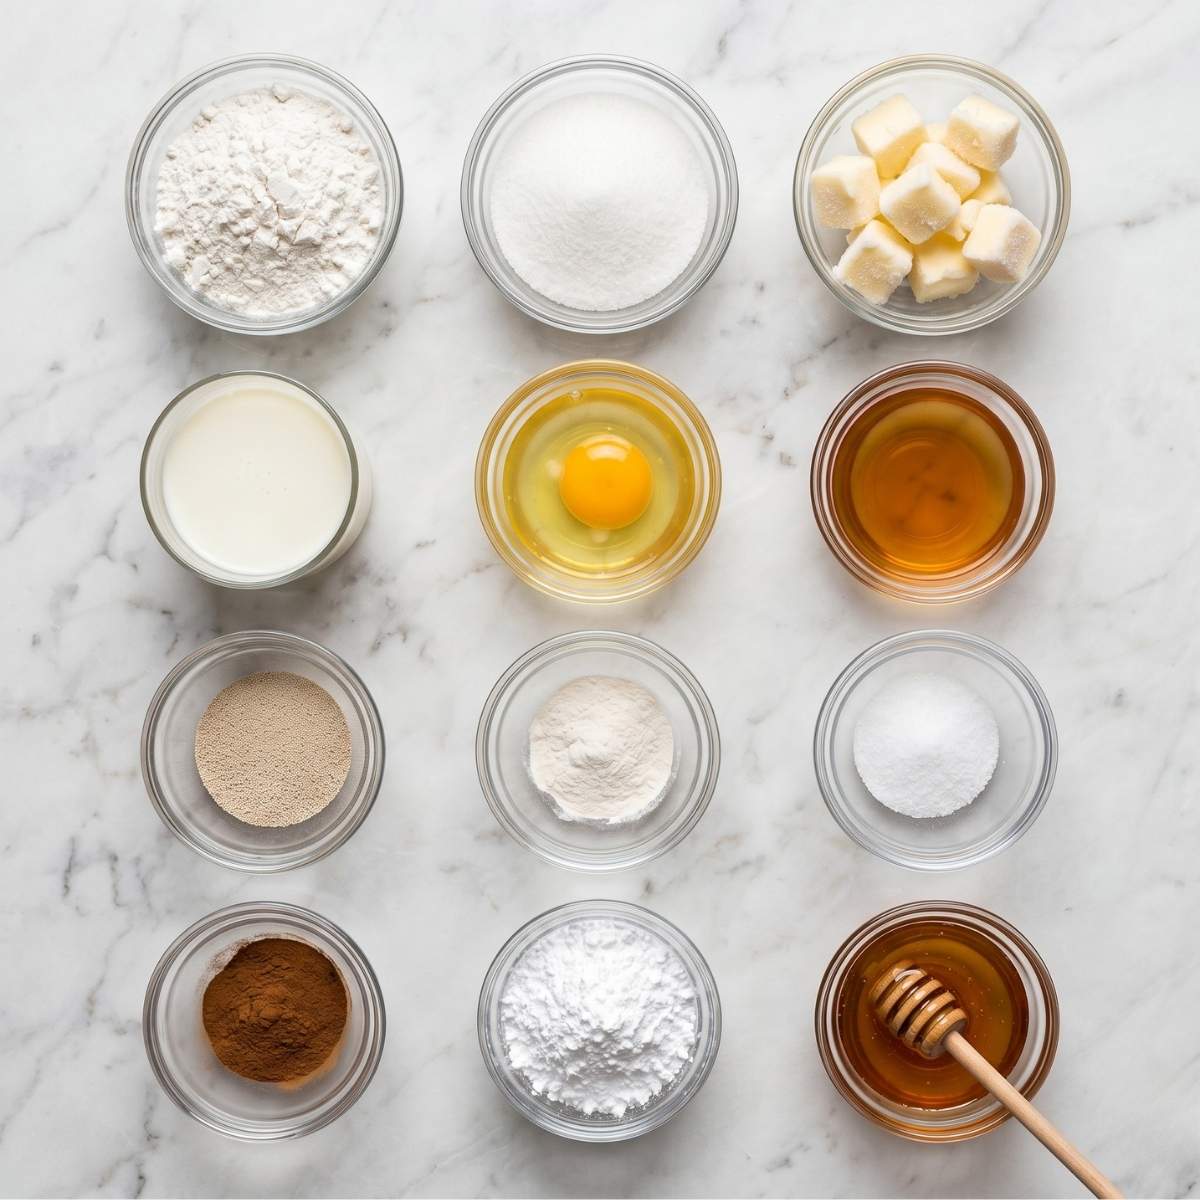
Ingredients for Gluten Free Cruffins
These gluten free cruffins use a gluten free enriched dough that gets its incredible flakiness from the grated frozen butter technique. The ingredient list might look a little longer than a typical muffin recipe but every single item earns its place. I'll explain the most important ones below.
What You'll Need
For the gluten-free enriched dough:
- 2 cups gluten-free all-purpose flour blend (with xanthan gum included)
- 2 teaspoons instant yeast
- 1 tablespoon granulated sugar
- ½ teaspoon salt
- ½ teaspoon xanthan gum (add only if your flour blend does not already contain it)
- ¾ cup warm whole milk (110°F, not hotter)
- 1 large egg, room temperature
- 2 tablespoons unsalted butter, melted
- 1 teaspoon apple cider vinegar
For the lamination layers:
- 6 tablespoons unsalted butter, frozen solid
- 2 tablespoons granulated sugar
- 1 teaspoon ground cinnamon
For the cinnamon sugar coating:
- ¼ cup unsalted butter, melted
- ⅓ cup granulated sugar
- 1 ½ teaspoons ground cinnamon
For finishing (optional):
- Powdered sugar for dusting
- Honey or maple syrup for drizzling
Why These Ingredients Matter
- Gluten-free flour blend with xanthan gum: This is the foundation of the entire recipe and the most critical ingredient choice you will make. A quality blend that already contains xanthan gum, such as Bob's Red Mill Gluten Free 1 to 1 or King Arthur Gluten-Free Measure for Measure, gives your gluten free cruffins the elasticity and structure they need to hold together through the rolling, shaping, and baking process. Without xanthan gum, the dough crumbles and the spiral layers fall apart in the muffin tin. Always check the label before you start.
- Grated frozen butter for lamination: This is the secret technique that creates those gorgeous flaky buttery layers inside every gluten free cruffin. Grating completely frozen butter directly over the rolled dough creates thin, even layers of fat distributed throughout. When the gluten free cruffins hit the oven, that butter creates steam between the layers and puffs them apart into that beautiful, flaky interior texture you are chasing. Softened or melted butter simply will not work the same way. The butter must be frozen solid before it touches the grater.
- Apple cider vinegar in the dough: This might seem unexpected in a pastry recipe but it plays two important roles in gluten-free baking. First, it activates additional lift from the baking agents and helps the yeast perform better in a gluten-free environment. Second, it tenderizes the dough slightly, making it more pliable and easier to roll without cracking. You will not taste it in the finished gluten free cruffin at all.
How to Make Gluten Free Cruffins
Step-by-Step Directions
- Activate the yeast. Warm the milk to 110°F. It should feel warm on your wrist, not hot. Stir in the sugar and instant yeast and let it sit for 5 to 7 minutes until foamy and fragrant. If the mixture does not foam, your yeast is not active or your milk was too hot. Start again with fresh yeast before proceeding.
- Make the dough. In a large bowl, whisk together the gluten-free flour blend, salt, and xanthan gum if needed. In a separate small bowl, whisk together the activated yeast mixture, egg, melted butter, and apple cider vinegar. Pour the wet ingredients into the dry and mix with a spatula until a soft, slightly sticky dough forms. It will look stickier than a traditional wheat dough. That is completely normal for gluten free yeast dough handling. Do not add extra flour.
- Rest the dough. Cover the bowl with plastic wrap and let the dough rest at room temperature for 45 minutes to 1 hour. It will not double in size like traditional wheat dough but it will puff slightly and become more relaxed and workable. This resting step is essential for the gluten-free flour blend to fully hydrate.
- Prepare the frozen butter. While the dough rests, place the 6 tablespoons of butter in the freezer if it isn't already frozen solid. It needs to be completely frozen before grating. Mix the 2 tablespoons of sugar and 1 teaspoon of cinnamon together in a small bowl for the filling and set aside.
- Roll the dough. Lay a large piece of parchment paper on your work surface and dust it lightly with gluten-free flour. Turn the rested dough out onto the parchment and dust the top lightly as well. Roll the dough into a large rectangle approximately 12 inches by 10 inches. Work gently and patch any cracks by pressing the dough back together with your fingertips. Gluten-free dough is more delicate than wheat dough but it is very forgiving.
- Add the grated frozen butter. Working quickly before the butter softens, grate the frozen butter directly over the surface of the rolled dough using a box grater. Spread the grated butter as evenly as possible, leaving a small border along one long edge. Sprinkle the cinnamon sugar filling evenly over the top of the grated butter.
- Roll and slice. Using the parchment paper to help you, roll the dough tightly from one long edge into a log, exactly like cinnamon roll style rolling. Press the seam gently to seal. Using a sharp knife, cut the log into 6 equal portions.
- Shape in the muffin tin. Grease a standard 6-cup muffin tin generously with butter or cooking spray. Take each dough portion and stand it on its cut end in the muffin cup. Gently press the spiral down slightly so it fills the cup. The layers should be visible from the top. Repeat with all 6 portions.
- Second rest. Cover the muffin tin loosely with plastic wrap and let the shaped gluten free cruffins rest for 20 to 30 minutes at room temperature while you preheat your oven to 375°F. This short rest helps the dough relax after shaping and gives you a better rise in the oven.
- Bake. Remove the plastic wrap and bake the gluten free cruffins at 375°F for 22 to 26 minutes until deep golden brown on top and the edges look crispy and caramelized. They should feel firm when lightly pressed on top. Let them cool in the tin for 5 minutes before removing.
- Coat in cinnamon sugar. While the cruffins are still warm, brush each one generously with the melted butter coating. Then roll or sprinkle each gluten free cruffin thoroughly in the cinnamon sugar mixture until fully coated. Serve immediately for the best experience while the exterior is still slightly crispy and the inside is warm and flaky.
Hint: Work as quickly as possible when grating the frozen butter over the dough. As soon as the butter starts to soften and smear rather than grate into clean shreds, pop it back in the freezer for 5 minutes before continuing. Soft butter will absorb into the dough instead of creating distinct layers and you will lose that beautiful flaky interior texture that makes gluten free cruffins so special.
If you love cozy, indulgent gluten-free breakfast bakes, my Gluten Free Waffles are another weekend morning staple that comes together faster than you'd think and always gets rave reviews.
My Top Tips for Gluten Free Cruffins
The biggest thing I want you to remember is that gluten-free enriched dough behaves differently from wheat dough and that is completely okay. It will feel stickier, it will not spring back the same way when you poke it, and it will not rise dramatically during the resting periods. None of that means something has gone wrong. Trust the process, handle the dough gently, and the results will absolutely be worth it.
Gold Tip: Chill the shaped gluten free cruffins in the muffin tin in the fridge for 15 minutes before the second rest if your kitchen is warm. Keeping the butter layers cold and distinct right up until baking is what creates the maximum flakiness in the finished cruffin. A warm kitchen softens the butter too quickly and the layers merge together before they hit the oven heat. A quick chill makes all the difference in the final texture.
Little Moments in the Kitchen
The first time I made these gluten free cruffins with Olivia, she was in charge of grating the frozen butter over the dough. She took about three swipes with the grater, decided it was "the hardest job in cooking," and immediately tried to negotiate a transfer to the cinnamon sugar mixing station. I told her the butter grating was the most important job in the whole recipe and she straightened right back up and took it very seriously after that.
When the cruffins came out of the oven all golden and spiraled and gorgeous, Olivia stood at the oven door with her hands clasped and said, "We made those? They look like they're from a real bakery, Mom." I handed her the first one, still warm, rolled in cinnamon sugar, and she took one bite and went completely quiet for a solid five seconds. Then she looked up and said, "Okay. These are better than the ones at the bakery downtown." That right there is why I keep baking.
Substitutions for Gluten Free Cruffins
- Gluten-free flour blend: Bob's Red Mill Gluten Free 1 to 1, King Arthur Gluten-Free Measure for Measure, and Cup4Cup all work well in this recipe. Avoid single-ingredient flours like almond flour, coconut flour, or rice flour alone. They do not have the right starch structure or binding ability for a gluten free enriched dough that needs to roll and layer without falling apart.
- Whole milk: Swap for full-fat oat milk or canned full-fat coconut milk for a dairy-free version. Both have enough fat content to give the dough a similar richness and tenderness to whole milk. Avoid thin, low-fat plant milks since they make the dough too wet and loose.
- Butter in the dough and lamination: Replace with a solid dairy-free butter stick such as Miyoko's Creamery European Style for both the dough and the grated frozen butter lamination. It must be a solid stick-style butter that can be frozen and grated. Tub-style dairy-free spreads are too soft and will not work for the grating technique.
- Egg: Use a flax egg (1 tablespoon ground flaxseed mixed with 3 tablespoons water, rested for 5 minutes) as a swap for a fully vegan version. The texture will be very slightly less tender but the gluten free cruffins will still hold their shape and spiral beautifully.
- Cinnamon sugar filling: Swap the cinnamon for cardamom, pumpkin pie spice, or a mix of cinnamon and nutmeg for a different flavor profile. All work wonderfully with the buttery, flaky layers of these gluten free cruffins.
Variations on Gluten Free Cruffins
- Chocolate Gluten Free Cruffins: Replace the cinnamon sugar filling with a mixture of 2 tablespoons of cocoa powder, 2 tablespoons of sugar, and 1 tablespoon of softened butter spread thinly over the dough before rolling. After baking and while still warm, drizzle with melted dark chocolate instead of rolling in cinnamon sugar. This variation is deeply indulgent and genuinely incredible.
- Gluten Free Honey Rolls Style Cruffins: Skip the cinnamon sugar filling entirely and spread the dough with a mixture of softened butter and 2 tablespoons of honey before rolling. After baking, brush the warm cruffins with extra honey and a sprinkle of flaky sea salt. The result is a gluten free honey rolls inspired cruffin that is sweet, salty, and absolutely beautiful for a brunch table.
- Gluten Free Churro Cruffins: Double the cinnamon in both the filling and the coating. After rolling in the cinnamon sugar, drizzle the warm cruffins with a simple vanilla glaze made from powdered sugar and milk. This gluten free churro recipe inspired version tastes exactly like a churro in cruffin form and Olivia requests this variation every single time without fail.
For a full weekend brunch spread built around Olivia's favorites, I love pairing these gluten free cruffins with my Tater Tot Breakfast Casserole and Sweet Potato Hash Browns. It is the kind of brunch table that makes everyone want to stay all morning.
Equipment for Gluten Free Cruffins
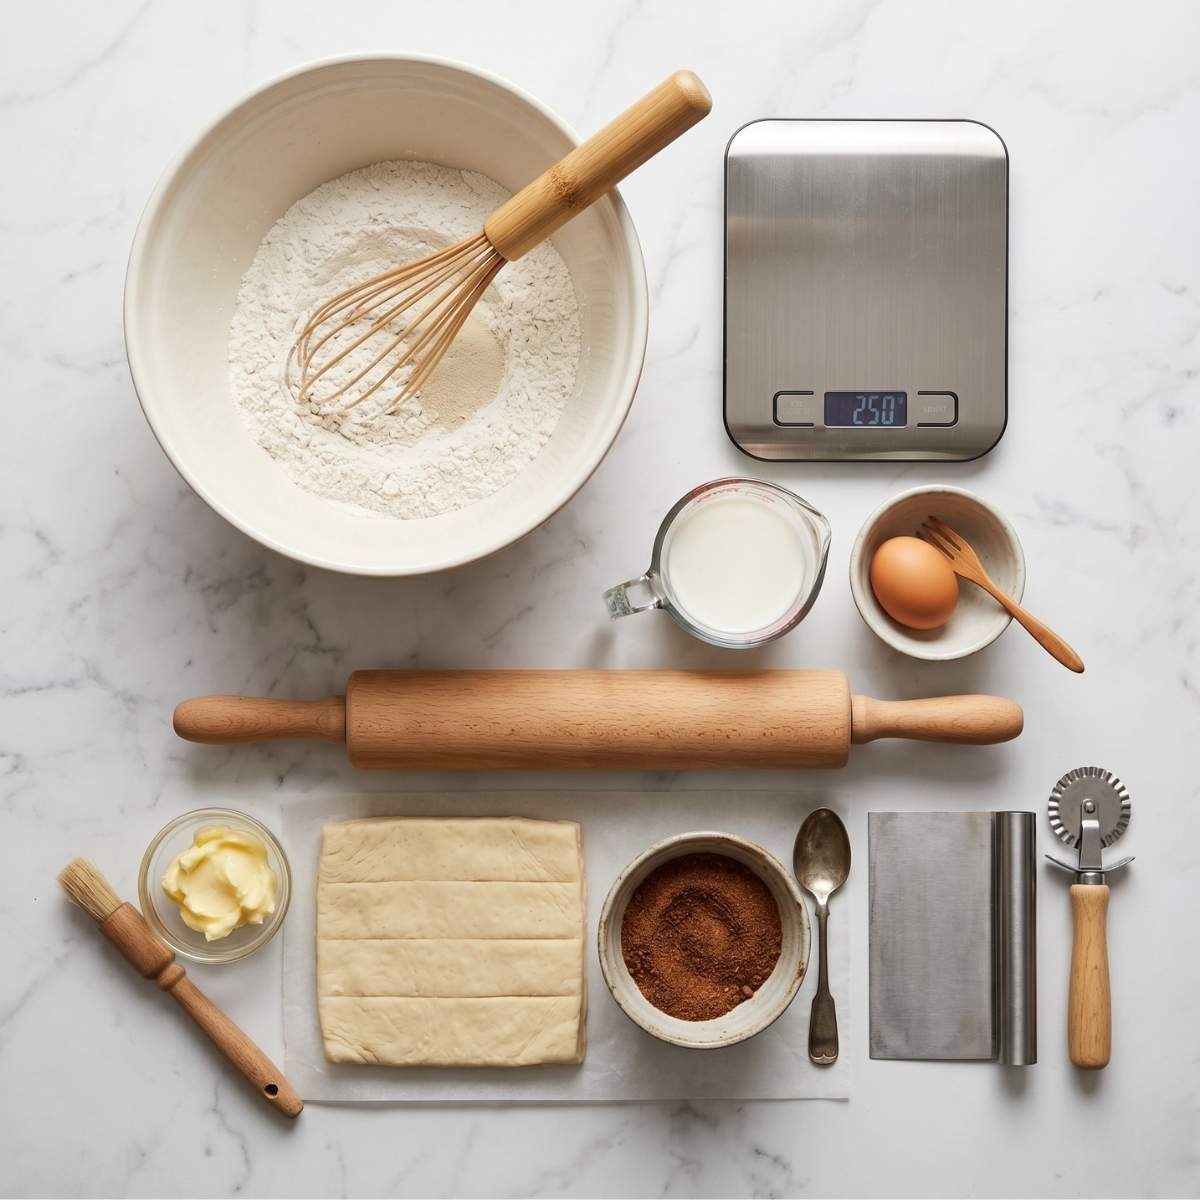
- Standard 6-cup muffin tin: The muffin tin spiral shaping method only works properly in a standard muffin tin where each cup holds the spiral upright and helps it maintain its shape during baking. A jumbo muffin tin gives you larger cruffins but requires adjusting the bake time. Mini muffin tins are too small for the dough portions and do not produce the right spiral effect.
- Box grater: Essential for the grated frozen butter technique. A standard four-sided box grater with a medium-sized grating surface works perfectly. Make sure it is dry and cold before you start grating. A warm grater softens the butter on contact and ruins the technique.
- Rolling pin: For rolling the dough into an even rectangle. A straight rolling pin gives you the most control over the thickness. If you don't have one, a straight-sided glass or bottle works in a pinch.
- Parchment paper: Working on parchment rather than directly on the counter prevents sticking, makes cleanup easy, and lets you use the parchment to help roll the dough log tightly without your hands warming the butter layers.
- Sharp knife or bench scraper: For cutting the log cleanly into 6 equal portions without compressing the layers. A dull knife drags and seals the edges of each portion, reducing the flakiness of the finished gluten free cruffin.
- Pastry brush: For applying the melted butter coating evenly over the warm cruffins before rolling them in the cinnamon sugar.
Storage Tips for Gluten Free Cruffins
- Best served fresh: These gluten free cruffins are at their absolute best within 2 hours of coming out of the oven while the exterior is still slightly crispy and the interior is warm and flaky. Making them fresh for the best experience is always my top recommendation.
- Room temperature storage: Store fully cooled gluten free cruffins in an airtight container at room temperature for up to 2 days. Line the container with a paper towel to absorb any excess moisture. The exterior will soften slightly as they sit but the flavor stays wonderful.
- Reheating: Reheat room temperature cruffins in a 325°F oven for 5 to 7 minutes to restore some of the crispiness to the exterior. Do not microwave them. The microwave makes gluten-free pastries soft and slightly gummy and you will lose the texture that makes these special.
- Fridge: Refrigerating these gluten free cruffins is not recommended. The cold air dries out the gluten-free dough faster than room temperature storage and makes them stale and crumbly more quickly.
- Freezer: Freeze fully cooled, uncoated cruffins in a single layer on a baking sheet for 1 hour before transferring to a labeled freezer bag. Freeze for up to 1 month. Reheat from frozen in a 350°F oven for 10 to 12 minutes until warmed through and slightly crispy. Roll in fresh cinnamon sugar after reheating rather than before freezing.
- Make ahead option: You can prepare the dough, roll it, fill it, and cut the log the night before. Place the shaped portions in the greased muffin tin, cover tightly with plastic wrap, and refrigerate overnight. Pull the tin out of the fridge 30 minutes before baking to take the chill off, then bake as directed.
Olivia's Tip for Gluten Free Cruffins
Olivia says you should always eat the gluten free cruffins while they are still warm because "cold cruffins are sad and warm cruffins are the best food ever made." She also insists on extra cinnamon sugar coating, way more than seems reasonable, and honestly she is not wrong about that either. More cinnamon sugar is always the right answer with these.
FAQ About Gluten Free Cruffins
Can you have gluten-free croissants?
Yes, and these gluten free cruffins are basically the answer to that question. Traditional croissants rely on gluten development for their flaky, laminated layers, which makes them very difficult to replicate in a gluten-free version. Gluten free cruffins use a simpler lamination process with the grated frozen butter technique, which creates beautiful flaky layers in a gluten-free dough without requiring the complex folding process of a true croissant. The result is a croissant muffin hybrid pastry that delivers all the flakiness and buttery richness without any gluten at all.
What is a good gluten-free snack to bring to a party?
These gluten free cruffins are honestly one of the best options because they look impressive, travel well in an airtight container, and appeal to everyone at the table whether they are gluten-free or not. Other great options include gluten-free cinnamon biscuits, naturally gluten-free fritters, or a platter of fresh fruit with a dip. The key is choosing something that stands out as delicious on its own merits rather than something that just happens to be gluten-free.
What to serve someone who is gluten-free?
Focus on naturally gluten-free foods like roasted vegetables, rice dishes, proteins without marinades containing soy sauce or malt vinegar, fresh fruit, and quality gluten-free baked goods like these gluten free cruffins. Always check labels on packaged ingredients like broths, sauces, and spice blends since hidden gluten shows up in unexpected places. When in doubt, simple whole food dishes with fresh ingredients are always the safest and most delicious approach for a gluten-free guest.
What can gluten-free people eat at a party?
More than most people realize. Gluten-free guests can enjoy most proteins, vegetables, fruits, rice and potato dishes, and anything specifically made with a certified gluten-free flour blend like these gluten free cruffins. The main things to avoid are anything containing wheat, barley, or rye, which means most regular bread, pasta, crackers, cookies, and anything fried in shared oil with wheat-containing foods. Having at least one clearly labeled, dedicated gluten-free option at a party makes a huge difference for guests who are managing gluten intolerance or celiac disease.
Conclusion
These gluten free cruffins are genuinely one of my proudest recipe achievements in this kitchen. They are flaky, buttery, warm, coated in cinnamon sugar, and they taste like something a trained pastry chef made rather than a home baker on a Saturday morning. Once you nail the grated frozen butter technique and the spiral shaping method, this recipe becomes one you will make again and again for every brunch, holiday morning, and special occasion. If you love gluten-free baking projects like this one, my Cheesy Rotel Sausage Balls are another crowd-pleasing recipe that disappears fast at any gathering.
Give these gluten free cruffins a try this weekend and let me know how they turn out in the comments below! I love hearing from you. And if you want to explore more gluten-free baking inspiration, the Banana Blueberry Almond Flour Muffins on Allrecipes are a wonderful naturally gluten-free bake worth adding to your rotation. Happy baking, friends!
Related
Looking for other recipes like this? Try these:

Pairing
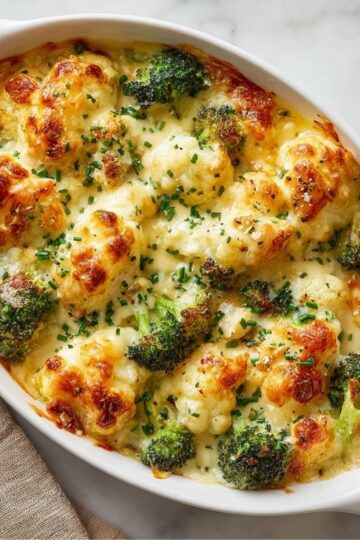
These are my favorite dishes to serve with Gluten Free Cruffins:
📖 Recipe
Easy Gluten Free Cruffins
Ingredients
Equipment
Method
- In a small bowl, stir the warm milk, sugar, and yeast. I always let Olivia watch for the bubbles, it's like magic when it turns foamy after a few minutes.
- In a large bowl, combine gluten-free flour, salt, then mix in the yeast mixture, egg, butter, and apple cider vinegar. Olivia loves helping stir until it becomes a soft, sticky dough.
- Cover the bowl and let the dough rest for about 1 hour. This is our little break time, usually when Olivia sneaks a snack and asks if they're ready yet.
- Roll the dough into a rectangle on parchment paper. I remind Olivia to be gentle, it's not like regular dough, but it comes together beautifully.
- Grate the frozen butter over the dough and sprinkle with cinnamon and sugar. Olivia calls this the "snowfall step," and honestly, it does look magical.
- Roll the dough tightly like a cinnamon roll, then slice into 6 pieces. This is Olivia's favorite step, she insists each one has to be "perfectly swirly."
- Place each piece into a greased muffin tin. Press gently so the spiral shows on top, it's where the magic happens.
- Let the shaped dough rest for 20-30 minutes while the oven preheats. Olivia usually checks them every five minutes like they might grow overnight.
- Bake at 375°F for 22-26 minutes until golden brown. The smell fills the kitchen, and that's when Olivia starts hovering near the oven.
- Brush warm cruffins with melted butter, then roll in cinnamon sugar. Olivia always adds extra coating, she says more is always better, and I think she's right.
Nutrition
Notes
- Always use frozen butter for the flaky layers, it makes all the difference.
- If your kitchen is warm, chill the dough briefly to keep the butter from melting.
- Store leftovers in an airtight container for up to 2 days.
- Reheat in the oven instead of the microwave for best texture.
- Try adding chocolate or swapping cinnamon for cardamom for fun variations.
Leave a Reply