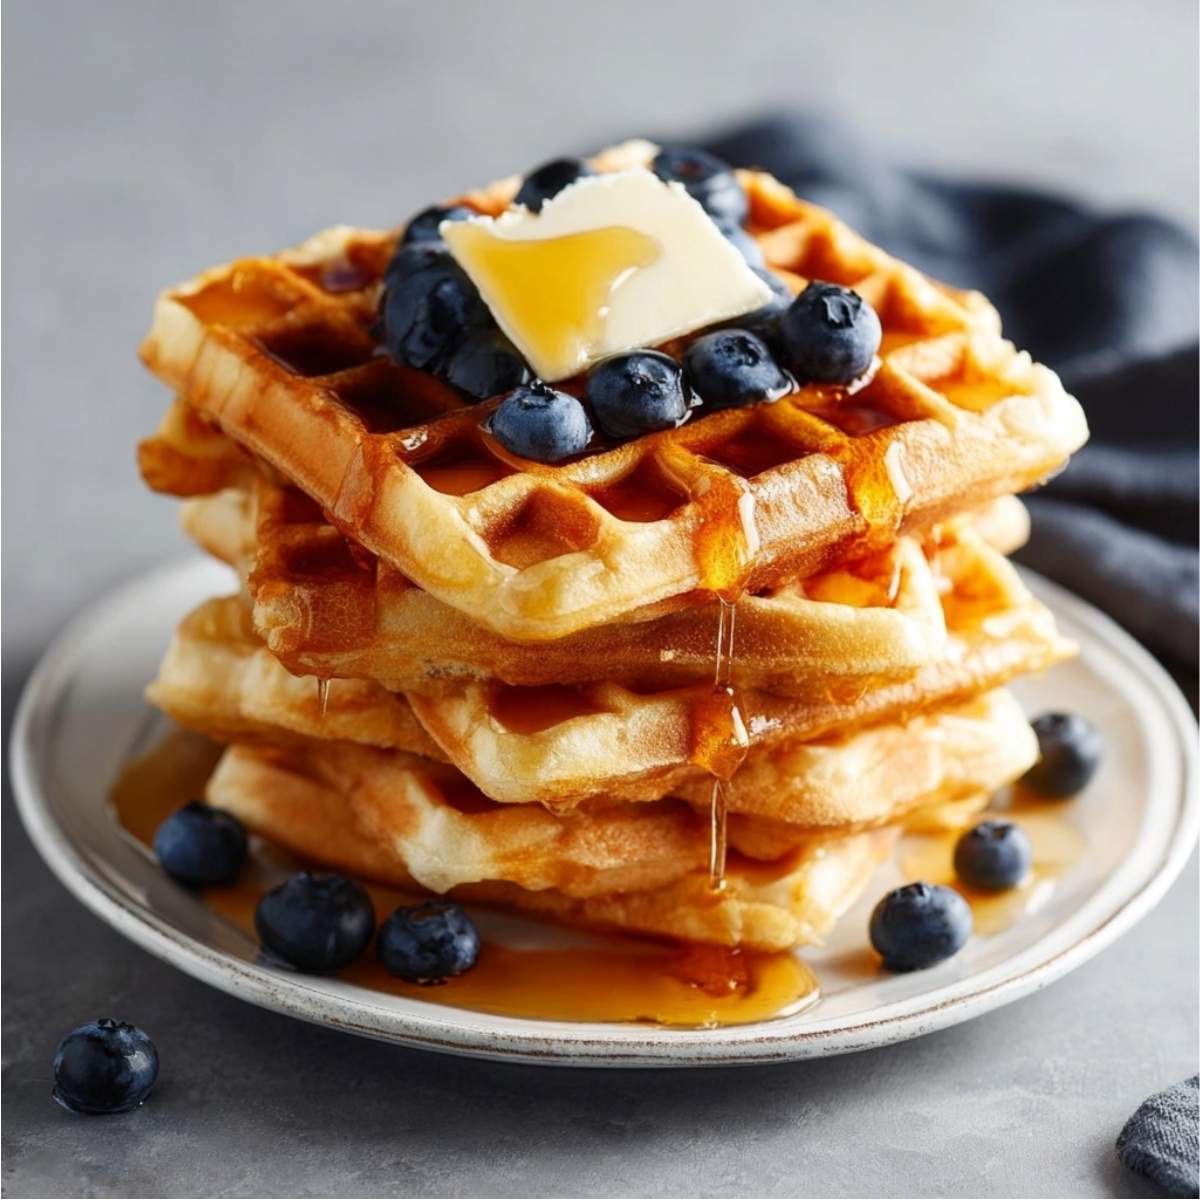
Gluten free waffles that are actually crispy on the outside, fluffy on the inside, and taste just like the real thing are not a myth, I promise you. I spent a good amount of time testing this recipe because I refused to settle for waffles that were gummy, dense, or fell apart the moment you looked at them. What I landed on is a simple, reliable gluten free waffle recipe made with pantry staples. It delivers golden, crispy edges and a soft, tender center every single time. No one at your table will know they're gluten-free unless you tell them.
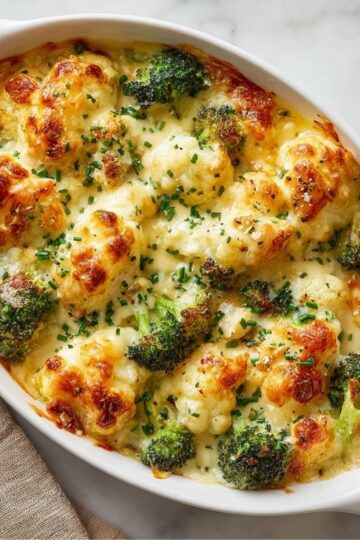
These gluten free waffles have become our Saturday morning tradition. Olivia sets the table, I handle the waffle iron, and we spend the whole morning in our pajamas eating waffles with way too many toppings. Whether you're newly gluten-free, cooking for someone who is, or just looking for a waffle recipe that works beautifully from scratch, this one is going to become a staple in your kitchen too. And if you love building a full cozy breakfast spread, my Cinnamon Roll Casserole is another crowd-pleasing morning recipe worth having in your back pocket right alongside this one.
Jump to:
- Why You'll Love These Gluten Free Waffles
- Ingredients for Gluten Free Waffles
- How to Make Gluten Free Waffles
- My Top Tips for Gluten Free Waffles
- Little Moments in the Kitchen
- Substitutions for Gluten Free Waffles
- Variations on Gluten Free Waffles
- Equipment for Gluten Free Waffles
- Storage Tips for Gluten Free Waffles
- Olivia's Tip for Gluten Free Waffles
- FAQ About Gluten Free Waffles
- Conclusion
- Related
- Pairing
- 📖 Recipe
Why You'll Love These Gluten Free Waffles
- They taste and feel like real waffles. Crispy golden edges, soft and fluffy centers, and zero gummy texture. This gluten free waffle recipe nails the texture that most gluten-free versions completely miss. You genuinely cannot tell the difference from a traditional waffle.
- The recipe uses simple, easy-to-find ingredients. No obscure flour blends, no hard-to-source specialty ingredients. A good gluten-free all-purpose flour blend, a few pantry staples, and you are ready to go. This is the kind of recipe you can make on a whim on a Saturday morning without a special grocery trip.
- It's endlessly customizable for different diets and tastes. Easy dairy-free milk substitutions, a simple egg replacer option for vegan waffles, and endless topping combinations mean this recipe works for almost everyone at the table.
Ingredients for Gluten Free Waffles
Everything in this gluten free waffle recipe is straightforward and accessible. The key is using a quality gluten-free all-purpose flour blend that already contains xanthan gum. That is what gives the waffles their structure and prevents them from crumbling. I'll explain exactly why each ingredient earns its place below.
What You'll Need
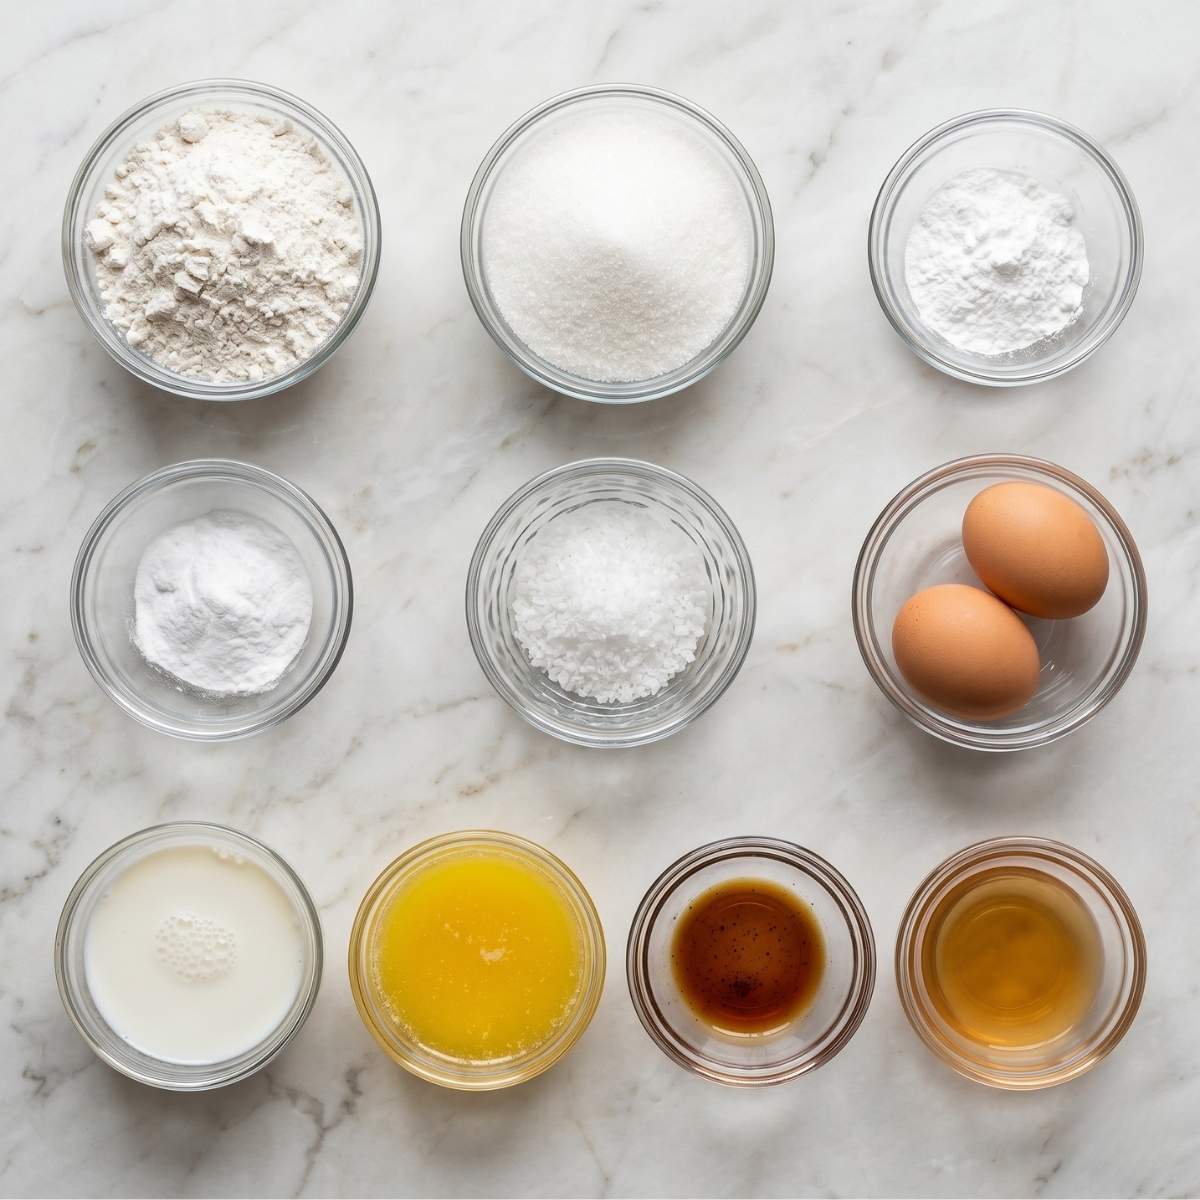
- 1 ½ cups gluten-free all-purpose flour blend (with xanthan gum included)
- 1 tablespoon sugar
- 1 ½ teaspoons baking powder
- ½ teaspoon baking soda
- ¼ teaspoon salt
- 2 large eggs, room temperature
- 1 cup whole milk (or dairy-free milk of choice)
- ⅓ cup unsalted butter, melted and slightly cooled
- 1 teaspoon pure vanilla extract
- 1 tablespoon apple cider vinegar
Why These Ingredients Matter
- Gluten-free all-purpose flour blend with xanthan gum: This is the backbone of the entire recipe. A quality blend like Bob's Red Mill Gluten Free 1 to 1 Baking Flour or King Arthur Gluten-Free Measure for Measure already contains xanthan gum. Xanthan gum mimics the binding and elasticity that gluten provides in regular flour. Without it, your gluten free waffles will crumble and fall apart. Always check the label before you start.
- Apple cider vinegar: This might seem unusual in a waffle batter but it is one of my favorite tricks for gluten-free baking. When combined with the baking soda it creates extra lift that makes the waffles lighter and more fluffy. It also helps tenderize the batter slightly, which improves the interior texture enormously. You do not taste it at all in the finished waffle.
- Melted butter: Butter is what gives these gluten free waffles their crispy golden edges and rich flavor. Some recipes use oil, which works, but butter creates a noticeably better crust in the waffle iron. Make sure it is melted and slightly cooled before adding it to the eggs. Adding hot butter to cold eggs can accidentally scramble them.
How to Make Gluten Free Waffles
Step-by-Step Directions
- Preheat your waffle iron. Turn your waffle iron on to medium-high heat and let it fully preheat before any batter goes in. A fully preheated waffle iron creates that crispy golden exterior immediately on contact. If the iron isn't hot enough, the batter steams instead of crisping. You end up with pale, soft waffles that nobody wants.
- Mix the dry ingredients. In a large bowl, whisk together the gluten-free flour blend, sugar, baking powder, baking soda, and salt until evenly combined. Whisking the dry ingredients together first ensures the leavening is evenly distributed throughout the batter.
- Mix the wet ingredients. In a separate medium bowl, whisk together the eggs, milk, melted butter, vanilla extract, and apple cider vinegar until smooth. Make sure your eggs and milk are at room temperature. Cold eggs added to warm melted butter can cause the butter to solidify into small lumps in the batter.
- Combine wet and dry. Pour the wet ingredients into the dry ingredients and stir gently with a spatula until just combined. The batter should look thick and slightly lumpy. Do not overmix. Overmixing gluten-free batter develops the starches too much. It results in a dense, gummy waffle instead of a light and fluffy one.
- Rest the waffle batter. Let the batter rest for 5 minutes at room temperature before cooking. This resting step allows the gluten-free flour blend to fully hydrate and the leavening agents to activate. It makes a noticeable difference in the final texture of your gluten free waffles. Do not skip this step.
- Grease and fill the waffle iron. Lightly brush or spray the preheated waffle iron with melted butter or cooking spray. Pour enough batter to fill your waffle iron about three quarters full. Spreading it slightly toward the edges helps it cook evenly all the way to the corners.
- Cook the waffles. Close the waffle iron and cook for 4 to 5 minutes without opening it early. Opening the iron too soon tears the waffle in half before it has set. The waffle is ready when the steam from the iron has reduced significantly. It should look deep golden brown and release cleanly from the iron without sticking.
- Keep warm and repeat. Transfer finished waffles to a wire rack set over a baking sheet in a 200°F oven. This keeps them warm and maintains their crispiness while you cook the remaining batter. Never stack hot gluten free waffles directly on top of each other. The steam trapped between them makes them go soggy fast.
Hint: For the crispiest gluten free waffles possible, make sure your waffle iron is fully preheated before the first waffle goes in. Resist the urge to open it early. Give it the full 4 to 5 minutes. The steam slowing down is the best signal that the waffle is done and ready to come out perfectly golden.
My Top Tips for Gluten Free Waffles
The biggest key to great gluten free waffles is not rushing the process. Let the batter rest, let the waffle iron fully preheat, and let each waffle cook all the way through before opening. Gluten-free batters behave slightly differently from regular batters. They need a little more patience at each step. Every time I have rushed this recipe I have ended up with waffles that stuck, tore, or had a gummy center.
Gold Tip: Always bring your eggs and milk to room temperature before making the batter. Cold dairy ingredients cause the melted butter to seize and clump when they meet in the bowl. This creates an uneven, lumpy batter that never comes fully together. Set them out on the counter 20 to 30 minutes before you start. You will notice the difference in how smoothly the batter comes together.
Little Moments in the Kitchen
The first Saturday I made these gluten free waffles, Olivia was standing next to the waffle iron watching it like a hawk. She had appointed herself the official "waffle checker" and kept trying to open the iron after about 90 seconds to see if they were done. I must have said "don't open it yet" about four times before the first waffle was finished.
When it finally came out golden and perfectly crispy, she picked it up, examined it from all angles like she was a food critic on a television show, took a bite, and then looked at me very seriously and said, "Mom. This does not taste gluten-free." I told her that was the whole point and she nodded slowly like she was deeply impressed. She then proceeded to eat two full waffles piled with strawberries, whipped cream, and what I can only describe as an unreasonable amount of maple syrup. Best review I could have asked for.
Substitutions for Gluten Free Waffles
- Gluten-free flour blend: Bob's Red Mill Gluten Free 1 to 1, King Arthur Gluten-Free Measure for Measure, and Cup4Cup all work well in this recipe. Avoid single-ingredient flours like almond flour or coconut flour on their own. They do not have the right starch structure for waffles and will not give you the right texture.
- Xanthan gum: If your flour blend does not contain xanthan gum, add ½ teaspoon separately. Without it, your gluten free waffles will crumble and fall apart when you try to remove them from the iron.
- Whole milk: Swap for oat milk, almond milk, or full-fat coconut milk using the same quantity for a dairy-free version. Oat milk gives the closest texture to whole milk in this recipe. It is my top recommendation for a dairy-free milk substitution.
- Butter: Replace with refined coconut oil or a neutral vegetable oil using the same quantity for a dairy-free swap. The waffles will be slightly less rich but still crispy and delicious.
- Eggs: Use a flax egg (1 tablespoon ground flaxseed mixed with 3 tablespoons water, rested for 5 minutes) as an egg replacer for vegan waffles. The texture will be very slightly denser but still holds together well and tastes great.
- Sugar: Swap for coconut sugar or maple syrup using the same quantity. Maple syrup adds a subtle background sweetness that pairs beautifully with the vanilla in the batter.
Variations on Gluten Free Waffles
- Blueberry Gluten Free Waffles: Fold ½ cup of fresh or frozen blueberries gently into the finished batter just before cooking. The blueberries burst slightly during cooking and create pockets of jammy, sweet fruit throughout the waffle. Top with extra fresh blueberries and a drizzle of honey for a beautiful breakfast presentation.
- Cinnamon Spice Gluten Free Waffles: Add 1 teaspoon of cinnamon, ¼ teaspoon of nutmeg, and an extra ½ teaspoon of vanilla to the dry ingredients. These warm spiced waffles are incredible served with maple syrup, sliced bananas, and a dollop of nut butter. They taste like a cozy autumn morning in waffle form.
- Vegan Gluten Free Waffles: Use the flax egg substitution, swap the butter for coconut oil, and use oat milk in place of whole milk. This fully vegan and gluten-free version still delivers crispy golden edges and a fluffy center. Top with coconut whipped cream and fresh fruit for a completely plant-based breakfast that nobody will complain about.
Whenever I'm planning a big Saturday brunch for Olivia and her friends, these gluten free waffles always anchor the table. I round out the spread with my Tater Tot Breakfast Casserole and Sweet Potato Hash Browns. Olivia picks the menu, and those two always make the list. Every single time.
Equipment for Gluten Free Waffles
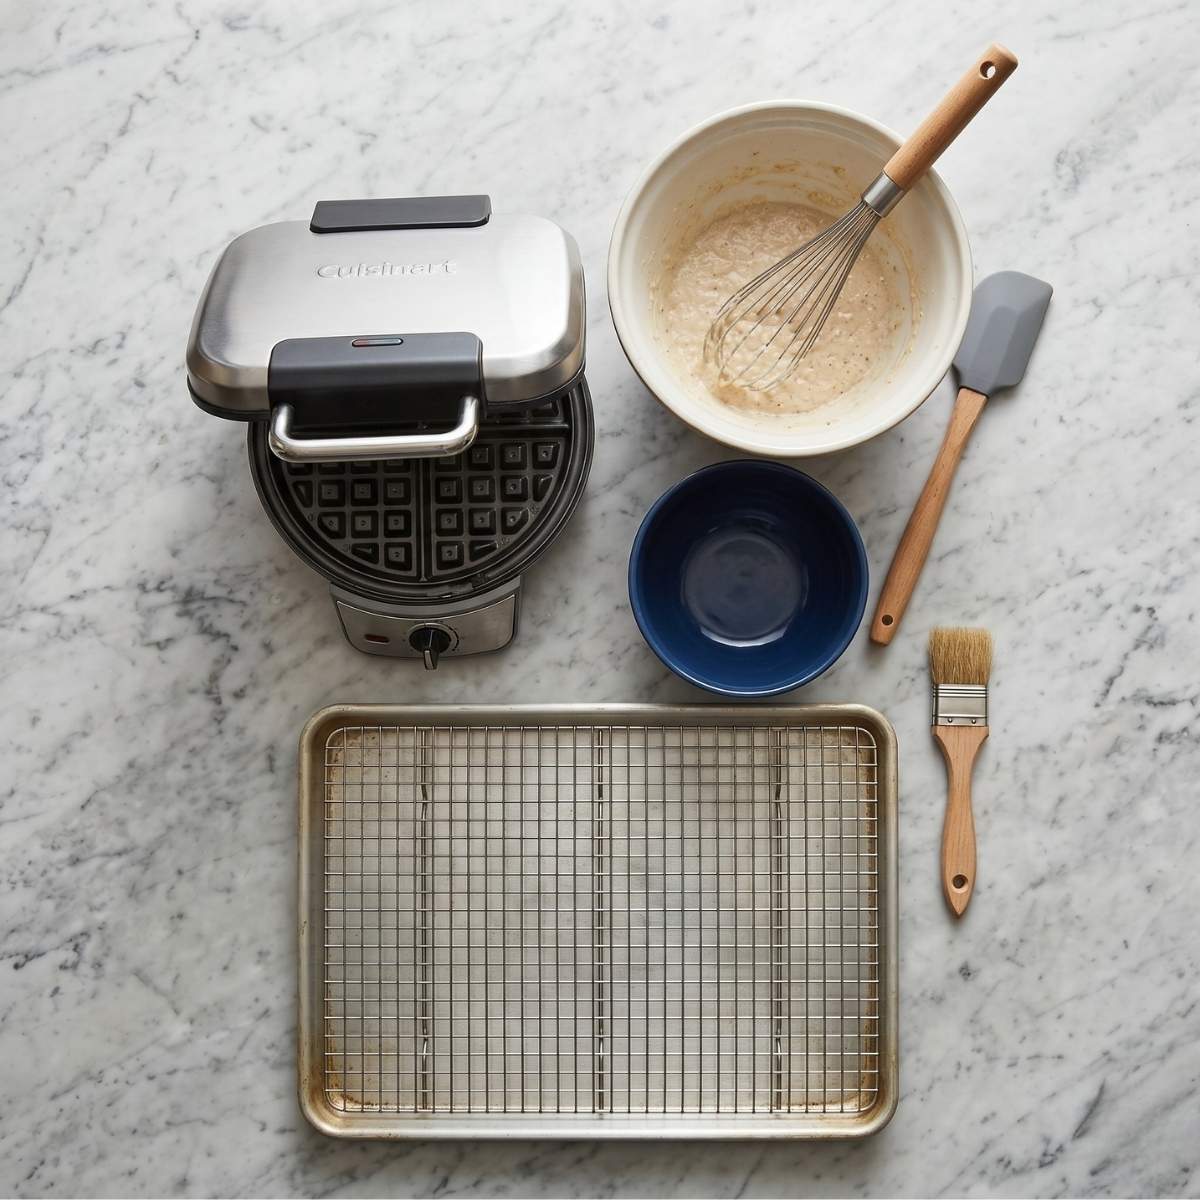
- Waffle iron: The most important piece of equipment for this recipe. A Belgian waffle iron with deep pockets gives you the thickest, fluffiest gluten free waffles with the most surface area for toppings and syrup. A standard waffle iron works too and produces thinner, crispier waffles. What matters most is that it heats evenly and has a non-stick surface in good condition. An old waffle iron with a worn coating is the most common reason gluten free waffles stick and tear.
- Two mixing bowls: One large for the dry ingredients and one medium for the wet. Keeping them separate until the last moment prevents overmixing when you combine them.
- Whisk and spatula: A whisk for mixing each bowl separately and a spatula for gently folding the wet into the dry. The spatula helps you stop mixing at just combined without overworking the batter.
- Wire rack over a baking sheet: Essential for keeping finished waffles warm and crispy in a 200°F oven while you cook the rest of the batch. A plate traps steam and makes them soggy. Always use a wire rack.
- Pastry brush or cooking spray: For greasing the waffle iron between each waffle. Even non-stick surfaces benefit from a light coating of butter or spray with gluten-free batters. They tend to stick slightly more than regular batters.
Storage Tips for Gluten Free Waffles
- Fridge: Store cooled leftover gluten free waffles in an airtight container or zip-lock bag in the fridge for up to 3 days. Place a sheet of parchment paper between each waffle to prevent them from sticking together.
- Freezer: These gluten free waffles freeze beautifully. Let them cool completely on a wire rack first. Then freeze in a single layer on a baking sheet for 1 hour before transferring to a labeled freezer bag. They keep well for up to 2 months and go straight from the freezer to the toaster with no thawing needed.
- Reheating for crispiness: Always reheat gluten free waffles in a toaster or in a 350°F oven for 5 minutes rather than the microwave. The microwave makes them soft and slightly gummy. The toaster restores that crispy exterior perfectly and they taste almost as good as fresh.
- Make ahead waffle batter: You can make the batter the night before and store it covered in the fridge for up to 12 hours. Give it a gentle stir before cooking since the ingredients may settle slightly. The rested batter actually produces a slightly more flavorful waffle. This is a great option for busy mornings.
- Wet vs dry storage: If you are storing waffles with fruit toppings already on them, store the toppings separately. Wet fruit toppings sitting on gluten free waffles overnight will make them soggy and soft no matter how well you store them.
Olivia's Tip for Gluten Free Waffles
Olivia says the best topping combination is sliced strawberries, whipped cream, and maple syrup all at the same time. She will not hear any arguments about it. "You need all three, Mom. Not just one. All three." She is also insistent that the maple syrup goes on last, over the whipped cream, so it drizzles down the sides. Honestly, she has excellent waffle topping instincts.
FAQ About Gluten Free Waffles
What gluten-free flour is best for waffles?
A gluten-free all-purpose flour blend that already contains xanthan gum is always my top recommendation. Bob's Red Mill Gluten Free 1 to 1 Baking Flour and King Arthur Gluten-Free Measure for Measure are both excellent and widely available. They are specifically formulated to behave like all-purpose flour in baking recipes. Your gluten free waffles will have the right structure, lift, and texture without any complicated adjustments.
What are common mistakes in making gluten-free waffles?
The most common mistakes are using a flour blend without xanthan gum (waffles fall apart), overmixing the batter (results in dense, gummy waffles), not resting the batter for 5 minutes (produces flat, less fluffy waffles), opening the waffle iron too early (tears the waffle before it has set), and stacking hot waffles on a plate (traps steam and makes them soggy). Each of these is simple to avoid once you know to watch for them.
How do you make 4 ingredient gluten-free waffles?
A very simple version uses just a gluten-free flour blend, eggs, milk, and butter. Combine 1 ½ cups of flour blend with 2 eggs, 1 cup of milk, and ⅓ cup of melted butter. Mix until just combined, rest for 5 minutes, and cook in a preheated waffle iron. The result won't be quite as fluffy or flavorful as this full recipe. But it works in a pinch when you need gluten free waffles fast with minimal ingredients.
Can you make gluten-free waffles in a waffle maker?
Absolutely, and a waffle maker is the only way to make proper gluten free waffles with the right crispy exterior and fluffy interior. The key is to fully preheat the waffle iron before adding any batter, grease it well between each waffle, and resist opening it before the steam has reduced. Gluten-free batters tend to stick slightly more than regular batters. A well-greased, fully preheated waffle iron makes all the difference between a waffle that releases cleanly and one that tears in half.
Conclusion
These gluten free waffles are the recipe I wish I had found years ago. They are crispy, fluffy, deeply satisfying, and so easy to make that they have genuinely become part of our weekly breakfast routine. Whether you top them with fresh fruit and maple syrup, go full dessert mode with whipped cream and chocolate chips, or keep it simple with just butter and syrup, these waffles deliver every single time. If you love a big, cozy breakfast spread, my Cheesy Rotel Sausage Balls are another crowd-pleasing morning recipe worth making alongside these gluten free waffles.
Give these gluten free waffles a try this weekend and let me know how they turn out in the comments below! I love hearing from you, and if you want to explore more gluten-free waffle inspiration, the Gluten-Free Waffles on Allrecipes is a fun variation worth a look. Happy cooking, friends!
Related
Looking for other recipes like this? Try these:


Pairing
These are my favorite dishes to serve with [this recipe]:

📖 Recipe
Easy Gluten Free Waffles
Ingredients
Equipment
Method
- In Jasmine's kitchen, this is always Olivia's favorite job, she watches the waffle iron like it's magic. Preheat your waffle iron until fully hot so the waffles get those crispy golden edges right from the start.
- In a large bowl, whisk together gluten-free flour blend, sugar, baking powder, baking soda, and salt. Olivia loves helping here because she says it looks like "snow mixing in a bowl."
- In another bowl, whisk eggs, milk, melted butter, vanilla extract, and apple cider vinegar until smooth. Jasmine reminds Olivia to be gentle so the butter doesn't clump, this is where patience makes everything silky.
- Pour wet ingredients into dry and gently stir until just combined. The batter should stay slightly lumpy, Jasmine always tells Olivia that "perfect waffles don't come from overmixing."
- Let the batter rest for 5 minutes while Olivia sets the table. This tiny pause makes the waffles extra fluffy and helps everything come together beautifully.
- Lightly grease the waffle iron, pour in batter, and cook until golden and crisp. Olivia counts down the minutes like it's a countdown to joy, but Jasmine always reminds her not to peek too early.
- Place cooked waffles on a wire rack so they stay crisp. In their home, this is when the kitchen fills with laughter while they wait for the next batch.
Nutrition
Notes
- For dairy-free waffles, swap milk with oat milk and butter with coconut oil
- For vegan waffles, replace eggs with flax eggs (texture will be slightly denser)
- Always fully preheat the waffle iron for maximum crispiness
- Do not overmix the batter or the waffles may turn dense
- Leftover waffles freeze beautifully and reheat in a toaster for best texture
- Store in an airtight container for up to 3 days or freeze for up to 2 months
- Olivia's favorite topping combo is strawberries, whipped cream, and maple syrup all together
Leave a Reply