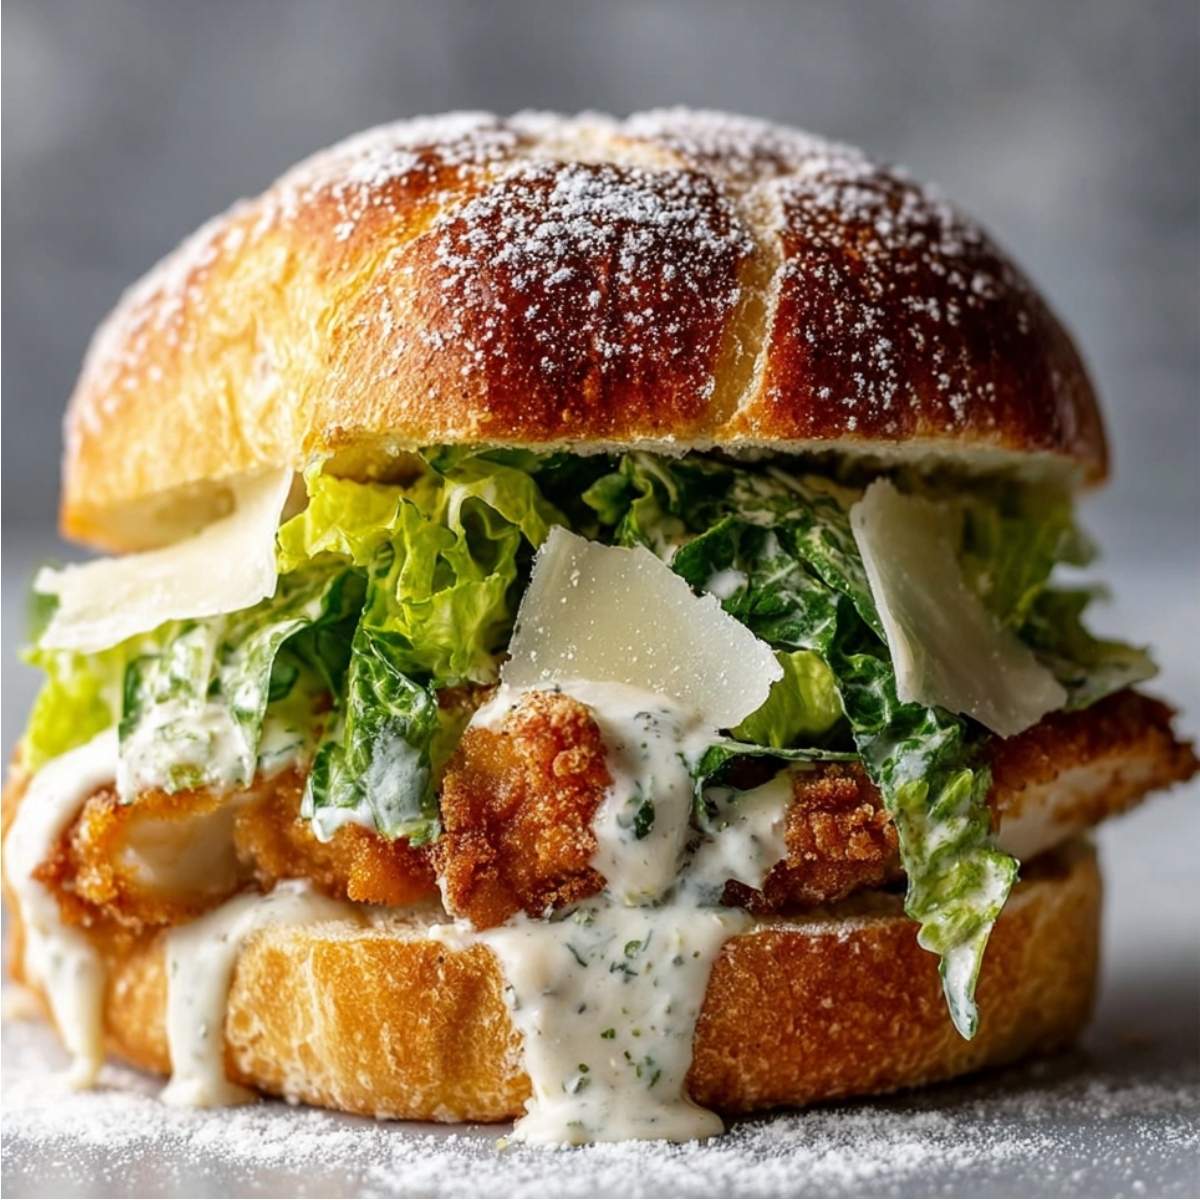
Crispy chicken Caesar sandwich is one of those lunches that feels like a serious upgrade from anything you could grab at a drive-through. We're talking a golden, parmesan-crusted chicken cutlet stacked on toasted crusty bread with crisp romaine, creamy homemade Caesar dressing, and shaved parmesan on top. This crispy chicken Caesar sandwich is crunchy, satisfying, and honestly one of the best things to come out of my kitchen in a long time. If you have ever searched for a crispy chicken Caesar sandwich near me and come up empty, this homemade version is exactly what you have been looking for.
This one has been all over TikTok for good reason, and once you make it at home, you will completely understand the hype. It works for a weekend lunch when you want something special, a casual dinner the whole family gets excited about, or any time you are craving that viral chicken Caesar sandwich energy without leaving the house. Trust me, once you try this version, ordering one out will feel like a step down.
Jump to:
- Why You'll Love This Crispy Chicken Caesar Sandwich
- Ingredients for Crispy Chicken Caesar Sandwich
- How to Make Crispy Chicken Caesar Sandwich
- My Top Tips for Crispy Chicken Caesar Sandwich
- Little Moments in the Kitchen
- Substitutions for Crispy Chicken Caesar Sandwich
- Variations on Crispy Chicken Caesar Sandwich
- Equipment for Crispy Chicken Caesar Sandwich
- Storage Tips for Crispy Chicken Caesar Sandwich
- Olivia's Tip for Crispy Chicken Caesar Sandwich
- FAQ About Crispy Chicken Caesar Sandwich
- Conclusion
- Related
- Pairing
- 📖 Recipe
Why You'll Love This Crispy Chicken Caesar Sandwich
- It delivers that viral TikTok crunch at home. The parmesan-crusted breading on this crispy chicken Caesar sandwich is everything. Golden, shatteringly crisp on the outside, juicy on the inside, and it holds up beautifully under all that creamy Caesar dressing without going soggy.
- It comes together in about 30 minutes. This is not an all-day project. With a simple breaded chicken dredging process and a quick pan fry, you are sitting down to one of the best sandwiches you have ever made in under half an hour.
- The whole family loves it. Olivia requests this on repeat and it is easy to customize the spice level, bread choice, and toppings to suit everyone at the table.
Ingredients for Crispy Chicken Caesar Sandwich
You do not need anything fancy to pull this off. Good chicken, a solid breading, fresh romaine, and a creamy Caesar dressing. That is really all it takes to make a sandwich this good.
What You'll Need

For the crispy chicken:
- 2 boneless, skinless chicken breasts, pounded thin to about ½ inch thickness
- ½ cup all-purpose flour
- 2 large eggs, beaten
- ¾ cup breadcrumbs (panko for extra crunch)
- ¼ cup finely grated parmesan cheese
- 1 teaspoon garlic powder
- 1 teaspoon paprika
- ½ teaspoon salt
- ¼ teaspoon black pepper
- Neutral oil for frying (vegetable or avocado oil)
For the Caesar dressing:
- ⅓ cup mayonnaise
- 1 tablespoon fresh lemon juice
- 1 teaspoon Worcestershire sauce
- 1 small garlic clove, finely minced or grated
- 2 tablespoons finely grated parmesan cheese
- Salt and black pepper to taste
For assembly:
- 2 crusty sandwich rolls, ciabatta, or brioche buns
- 1 tablespoon softened butter (for toasting the bread)
- 2 cups chopped romaine lettuce
- Extra shaved parmesan for topping
Why These Ingredients Matter
- Panko breadcrumbs with parmesan: This combination is the secret to the crust that makes this crispy chicken Caesar sandwich so satisfying. Panko is lighter and coarser than regular breadcrumbs, which creates more surface area for crisping. Adding finely grated parmesan directly into the breading gives the crust a nutty, salty depth that takes it from good to genuinely great.
- Paprika and garlic powder, bloomed in the breading: Here is a tip I picked up after making this sandwich more times than I can count. Before mixing the paprika and garlic powder into the panko, warm them briefly in a dry skillet over low heat for about 30 to 45 seconds, stirring constantly, until they smell fragrant and toasty. This blooming process wakes up the fat-soluble flavor compounds in both spices and gives the finished crust a noticeably deeper, more complex flavor that you simply cannot get from adding them cold. Watch them closely because they can burn in seconds.
- Pounding the chicken thin: This is not optional. A chicken breast pounded to an even ½ inch thickness cooks quickly and evenly, which means you get a fully cooked interior before the breading over-browns on the outside. It also gives you more crust-to-chicken ratio in every bite, which is always the goal.
- Homemade Caesar dressing: I know store-bought is easier, but a quick homemade Caesar dressing made with mayo, lemon, Worcestershire, garlic, and parmesan takes about 3 minutes to mix together and tastes so much brighter and fresher than anything from a bottle. It is what makes this sandwich taste restaurant-quality rather than just good.
How to Make Crispy Chicken Caesar Sandwich
Step-by-Step Directions
- Pound the chicken. Place each chicken breast between two sheets of plastic wrap or in a zip-lock bag. Use a meat mallet or rolling pin to pound to an even ½ inch thickness. This is the step most people skip and it makes the biggest difference in how evenly the chicken cooks.
- Set up the dredging station. Set out three shallow dishes in a row. Add flour to the first dish. Beat the eggs in the second dish. Combine the panko, grated parmesan, bloomed garlic powder, bloomed paprika, salt, and pepper in the third dish. Mix the breadcrumb mixture well so the seasoning is evenly distributed throughout.
- Bread the chicken. Working one piece at a time, dredge the chicken in the flour and shake off the excess. Dip it into the beaten egg and let any extra drip off. Press it firmly into the parmesan panko mixture on both sides, making sure the breading adheres completely with no bare spots.
- Fry the chicken. Heat about ¼ inch of neutral oil in a large skillet over medium-high heat. The oil is ready when a pinch of breadcrumbs dropped in sizzles immediately. Carefully lay the breaded chicken into the hot oil and cook for 3 to 4 minutes per side until deeply golden brown and the internal temperature reaches 165°F. Do not crowd the pan, cook one piece at a time if needed.
- Drain and rest. Transfer the crispy chicken cutlets to a wire rack set over a baking sheet, not a paper towel, to keep the bottom crust from steaming and going soft. Let it rest for 2 to 3 minutes.
- Make the Caesar dressing. While the chicken rests, whisk together the mayo, lemon juice, Worcestershire sauce, minced garlic, and parmesan in a small bowl. Season with salt and pepper to taste. This homemade Caesar dressing takes 3 minutes and makes the whole sandwich.
- Toast the bread. Spread softened butter on the cut sides of your rolls or ciabatta. Toast in a dry skillet over medium heat or under the broiler for 1 to 2 minutes until golden and fragrant. Garlic butter toasted bread is the foundation of a great crispy chicken Caesar sandwich, so do not skip this step.
- Assemble the sandwich. Spread a generous layer of Caesar dressing on both cut sides of the toasted bread. Add the crispy chicken cutlet on the bottom half. Pile on the chopped romaine and finish with extra shaved parmesan. Close it up and serve immediately.
Hint: To prevent a soggy sandwich, dress the romaine separately with just a light drizzle of Caesar dressing and build the sandwich right before serving. The dressing on the bread plus the lightly dressed greens gives you full flavor without turning the bread soft.
If you love bold, satisfying bowls with similar flavors, my Chicken Quinoa Bowl is a great weeknight companion recipe that uses a lot of the same pantry ingredients.
My Top Tips for Crispy Chicken Caesar Sandwich
The number one tip I give everyone for this sandwich is to use a wire rack instead of paper towels to drain the fried chicken. Paper towels trap steam underneath the cutlet and the bottom crust goes soft almost immediately. A wire rack lets air circulate all the way around, which keeps that golden crust crispy from edge to edge until the moment it hits the bread.
Gold Tip: Press the breading firmly onto the chicken with your hands at every stage of the dredging process. A light pat is not enough. Really press and hold for a few seconds so the panko parmesan crust bonds to the surface. This is what prevents the whole beautiful crust from sliding off the moment you take a bite.
Little Moments in the Kitchen
The first time I made this crispy chicken Caesar sandwich for Olivia, she watched me pound the chicken with the meat mallet and immediately asked if she could try it. I handed it over and she went at that chicken breast with such enthusiasm that it ended up about the size of a dinner plate. I had to explain that thin is the goal but there is a limit.
She declared herself the official breading station manager after that, which meant every piece of chicken was coated approximately three times in panko before it made it to the pan. The crust was absolutely enormous and completely insane and honestly it was the best version I have ever made. She looked at the finished sandwich, took one massive bite, and said, "This is better than a restaurant." That is the only review that matters in this house.
Substitutions for Crispy Chicken Caesar Sandwich
- Gluten-free: Swap the all-purpose flour for a gluten-free flour blend and use gluten-free panko breadcrumbs. The crust comes out just as crispy and golden. Check that your Worcestershire sauce is also gluten-free since some brands contain malt vinegar.
- Dairy-free: Leave the parmesan out of the breading and swap it for nutritional yeast for a similar savory, nutty flavor. Use a dairy-free mayo in the Caesar dressing and skip the parmesan topping, or use a dairy-free parmesan alternative.
- Bread swap: Ciabatta is my top choice for a crispy chicken Caesar sandwich because the open crumb soaks up the dressing beautifully without going soggy. Brioche buns add a rich sweetness that works really well too. A crusty sub roll is a great budget-friendly option that holds everything together perfectly.
- Baked version: Instead of pan-frying, place the breaded chicken on a greased wire rack set over a baking sheet and bake at 425°F for 18 to 20 minutes, flipping halfway through. It is not quite as crispy as the fried version but it is genuinely delicious and significantly lighter.
Variations on Crispy Chicken Caesar Sandwich
- Spicy crispy chicken Caesar sandwich: Add ½ teaspoon of cayenne pepper and a pinch of red pepper flakes to the panko mixture. Finish the assembled sandwich with a drizzle of hot honey over the romaine for that sweet heat combo that is completely addictive. This is the version that gets the most requests from friends when I make these for a crowd.
- Crispy chicken Caesar pizza sandwich: Spread a thin layer of Caesar dressing on the toasted bread, add the crispy chicken, top with shredded mozzarella, and pop it under the broiler for 90 seconds until the cheese is bubbly and melted. Finish with the fresh romaine and parmesan on top. It is the crispy chicken Caesar pizza sandwich mashup that sounds wild but tastes absolutely incredible.
- Chicken Caesar sandwich on ciabatta with roasted garlic: Roast a whole head of garlic at 400°F for 35 minutes until soft and caramelized. Squeeze the roasted cloves into the Caesar dressing and mix well. The flavor becomes deeper, sweeter, and more complex. Serve on toasted ciabatta for the most elevated version of this sandwich you will ever make.
Love building flavor-packed bowls with the same bold ingredients? My Shrimp Quinoa Bowl is another great option when you want something fresh, satisfying, and on the table fast.
Equipment for Crispy Chicken Caesar Sandwich
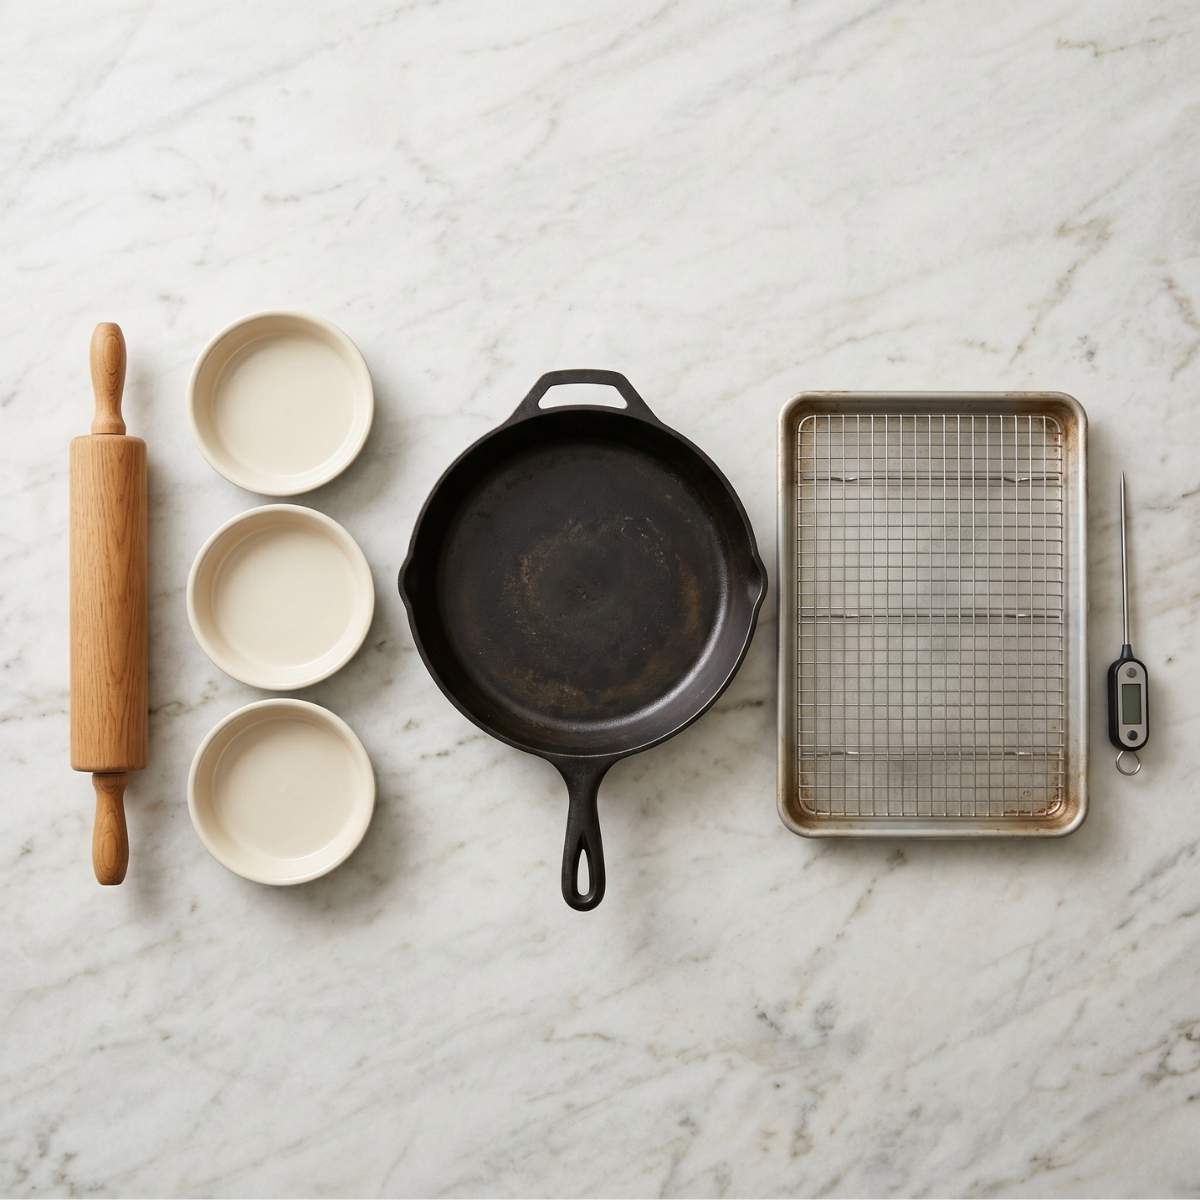
- Meat mallet or rolling pin: Essential for pounding the chicken to an even thickness. Even cooking starts with even thickness, and this tool makes that effortless.
- Three shallow dishes: For the dredging station. Wide, flat dishes (like pie plates) make it easy to coat the chicken evenly without the flour or breadcrumbs piling up in the center.
- Large heavy skillet (cast iron or stainless steel): Cast iron holds heat the most evenly and gives you the most consistent golden crust. Stainless steel works great too. Avoid non-stick for frying because it cannot handle the high heat needed for a proper golden crust.
- Wire rack over a baking sheet: For draining the fried chicken after cooking. This keeps the bottom crust crispy instead of steaming it soft on paper towels. It is a small change that makes a huge difference.
- Instant-read meat thermometer: To confirm the chicken hits 165°F internally. It removes all guesswork and ensures every crispy chicken Caesar sandwich is perfectly cooked and safe to eat.
Storage Tips for Crispy Chicken Caesar Sandwich
- Store components separately: The best way to store leftovers is to keep the crispy chicken cutlets, Caesar dressing, and romaine all in separate airtight containers in the fridge. Assembled sandwiches go soggy quickly and are best eaten fresh.
- Crispy chicken cutlets: Store cooked cutlets in an airtight container in the fridge for up to 3 days. Reheat in a 375°F oven or air fryer for 6 to 8 minutes to bring the crust back to life. The microwave will work but the crust will go soft.
- Caesar dressing: Homemade Caesar dressing keeps well in a sealed jar in the fridge for up to 5 days. Give it a good stir or shake before using since it may separate slightly as it sits.
- Freezer: The breaded, uncooked chicken cutlets freeze beautifully for up to 2 months. Important food safety note: freeze the breaded cutlets immediately after breading, do not let them sit at room temperature. Raw breaded chicken should go straight into the freezer within 30 minutes of being prepared to maintain freshness and prevent bacterial growth. Freeze them flat on a parchment-lined baking sheet first, then transfer to a labeled freezer bag once solid. Cook straight from frozen in a 400°F oven for 22 to 25 minutes, flipping halfway through, until the internal temperature reaches 165°F.
Olivia's Tip for Crispy Chicken Caesar Sandwich
Olivia says you absolutely need extra parmesan on top, way more than feels reasonable. "Like a whole snowstorm of it, Mom." She also insists the bread must be toasted until it is properly crunchy on the outside or it does not count as a real crispy chicken Caesar sandwich. Her standards are high and she is completely right.
FAQ About Crispy Chicken Caesar Sandwich
What is the trick to getting crispy chicken?
Three things make the biggest difference: pound the chicken to an even thickness so it cooks fast and evenly, press the breading on firmly at every stage of the dredge so it actually bonds to the surface, and drain on a wire rack instead of paper towels so the bottom crust stays crispy. Get those three things right and you will have perfectly golden crispy chicken every single time. Whether you are making this at home or trying to recreate a crispy chicken Caesar sandwich near me experience from your favorite local spot, these same principles apply across the board.
What is a chicken Caesar sandwich?
A chicken Caesar sandwich is a handheld version of the classic Caesar salad, built around a crispy or grilled chicken cutlet layered with crisp romaine, creamy Caesar dressing, and shaved parmesan on toasted bread. The crispy chicken Caesar sandwich version adds a golden, breaded cutlet that gives you crunch in every single bite. It is one of the most satisfying sandwiches you can make at home.
What is the best bread for a crispy chicken Caesar sandwich?
Ciabatta is my top pick because the open, airy crumb absorbs the Caesar dressing beautifully without going soggy and the crust adds another layer of crunch to every bite. Brioche buns work wonderfully for a softer, richer sandwich. A toasted baguette or crusty sub roll are both solid options too. Whatever you choose, always toast it with a little butter first so the surface is sealed and holds up to the dressing.
Is Caesar salad good for diabetics?
Traditional Caesar salad is relatively low in carbohydrates, which can make it a reasonable choice for blood sugar management. The romaine lettuce and parmesan are both low-glycemic. The dressing does contain some fat and sodium, so portion size matters. For a crispy chicken Caesar sandwich, choosing a lower-carb bread or serving the components as a salad bowl instead can make it a more diabetes-friendly option. Always check with your doctor or a registered dietitian for guidance specific to your needs.
Conclusion
This crispy chicken Caesar sandwich is the kind of recipe that makes you wonder why you ever ordered one from a restaurant in the first place. It is golden, crunchy, creamy, fresh, and completely over the top in the best possible way. Once you nail the breading, the bloomed spices, and the homemade Caesar dressing, this sandwich becomes the thing everyone requests at every single gathering.
Give it a try this week and tell me in the comments which bread you used! And if you are building out your lunch and dinner rotation, my Salmon Quinoa Bowl and Steak Quinoa Bowl are both bold, satisfying meals worth bookmarking. For even more crispy chicken inspiration, this Two-Handed Crispy Fried Chicken Sandwich from Allrecipes is a fantastic next step. Happy cooking, friends!
Related
Looking for other recipes like this? Try these:


Pairing
These are my favorite dishes to serve with Crispy Chicken Caesar Sandwich:


📖 Recipe
Easy Crispy Chicken Caesar Sandwich
Ingredients
Equipment
Method
- Place the chicken breasts between plastic wrap and gently pound them to an even thickness. Olivia loves helping with this step, she always gets a little too enthusiastic, but it makes the chicken cook perfectly every time.
- Set up three bowls, one with flour, one with eggs, and one with panko breadcrumbs, parmesan cheese, garlic powder, paprika, salt, and black pepper. I always let Olivia mix the breadcrumbs, she calls it the crunch magic.
- Dredge each piece of chicken in flour, dip into eggs, then press firmly into the breadcrumb mixture. Pressing is key, Olivia likes to say give it a hug so it stays crispy.
- Heat oil in a skillet and fry the chicken for 3 to 4 minutes per side until golden and crispy. The kitchen always smells amazing at this point, and Olivia starts asking if it is ready every minute.
- In a bowl, whisk together mayonnaise, lemon juice, Worcestershire sauce, garlic, and parmesan. It is creamy, tangy, and honestly what makes this sandwich unforgettable.
- Spread butter on your rolls and toast until golden. Olivia insists they need to be extra crunchy, and she is absolutely right.
- Spread Caesar dressing on the bread, add the crispy chicken, top with romaine lettuce and extra parmesan. Build it just before serving so everything stays crisp and fresh.
Nutrition
Notes
- For a lighter version, bake the chicken at 425°F for 20 minutes instead of frying.
- Use gluten free flour and breadcrumbs to make this recipe gluten free.
- Always assemble right before serving to keep the sandwich crispy.
- Store leftovers separately and reheat chicken in the oven for best texture.
- This sandwich is perfect for family lunches, weekend treats, or when you want something special without leaving home.


Leave a Reply